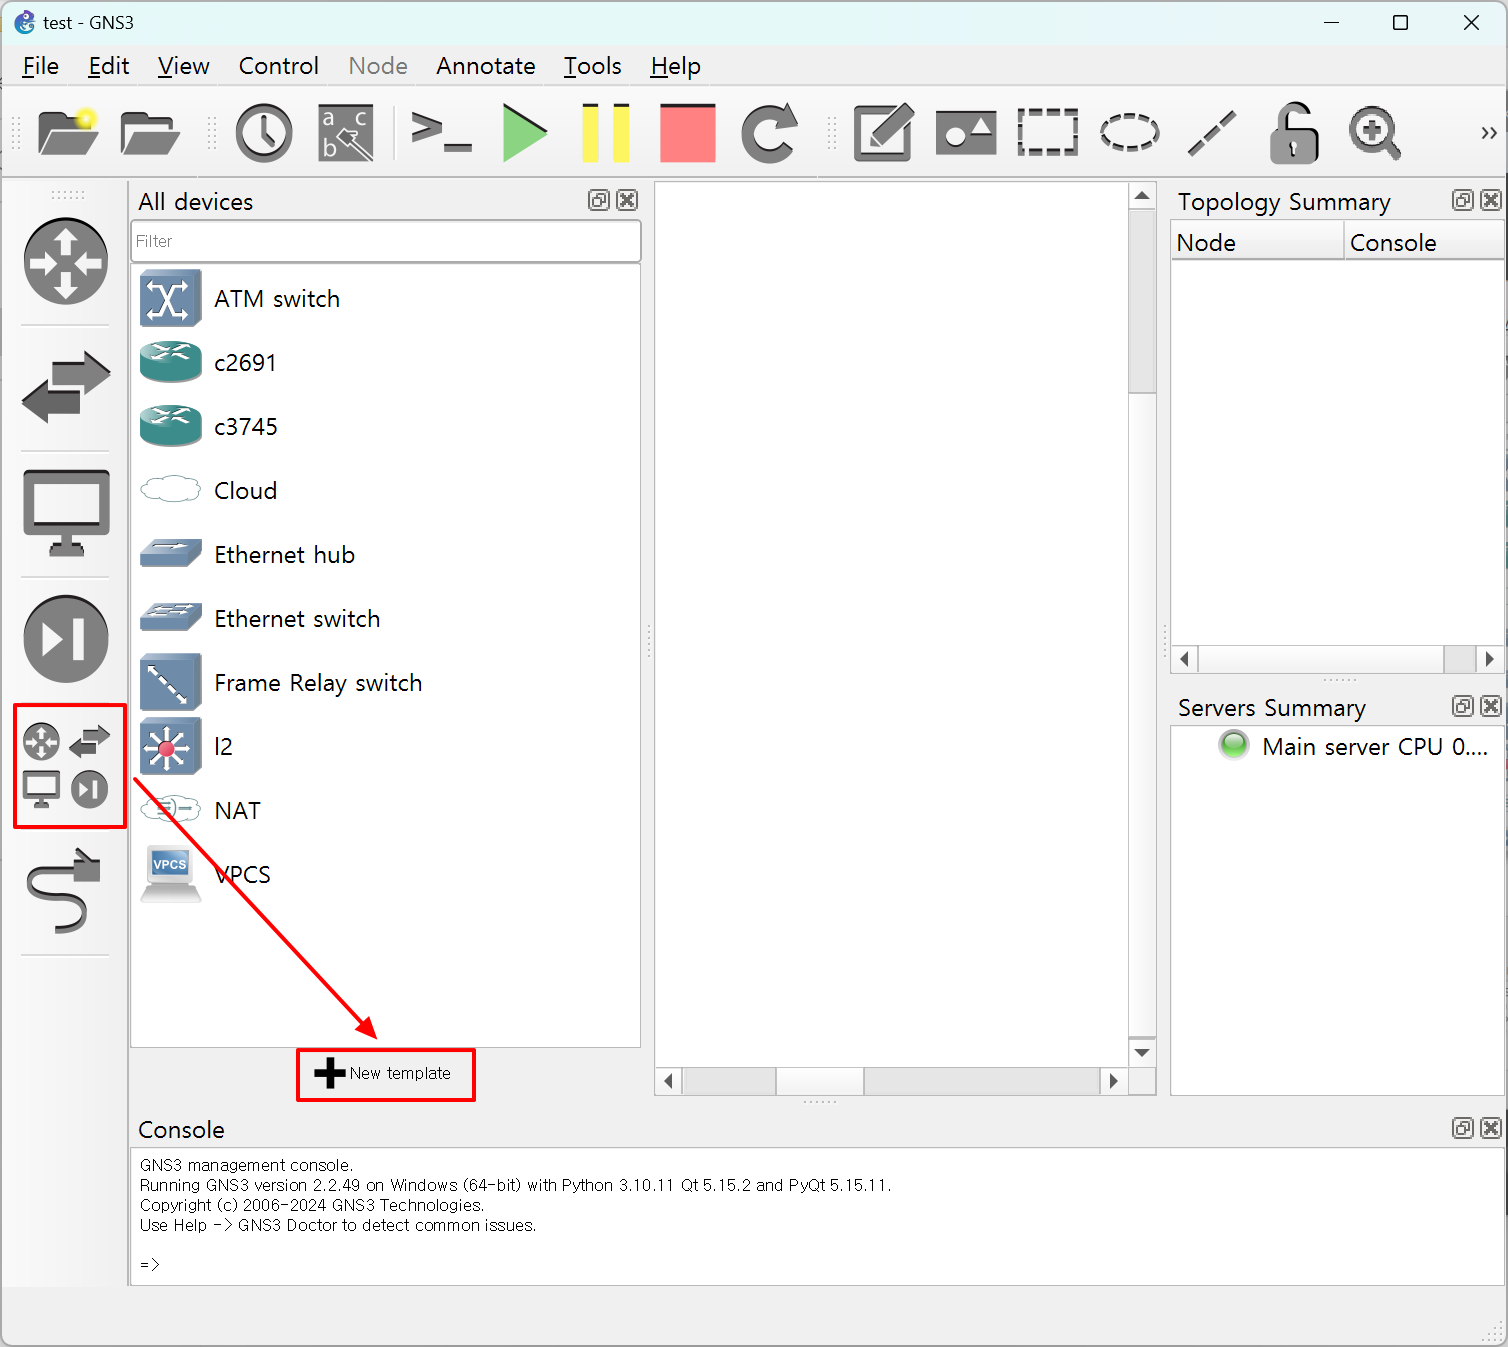
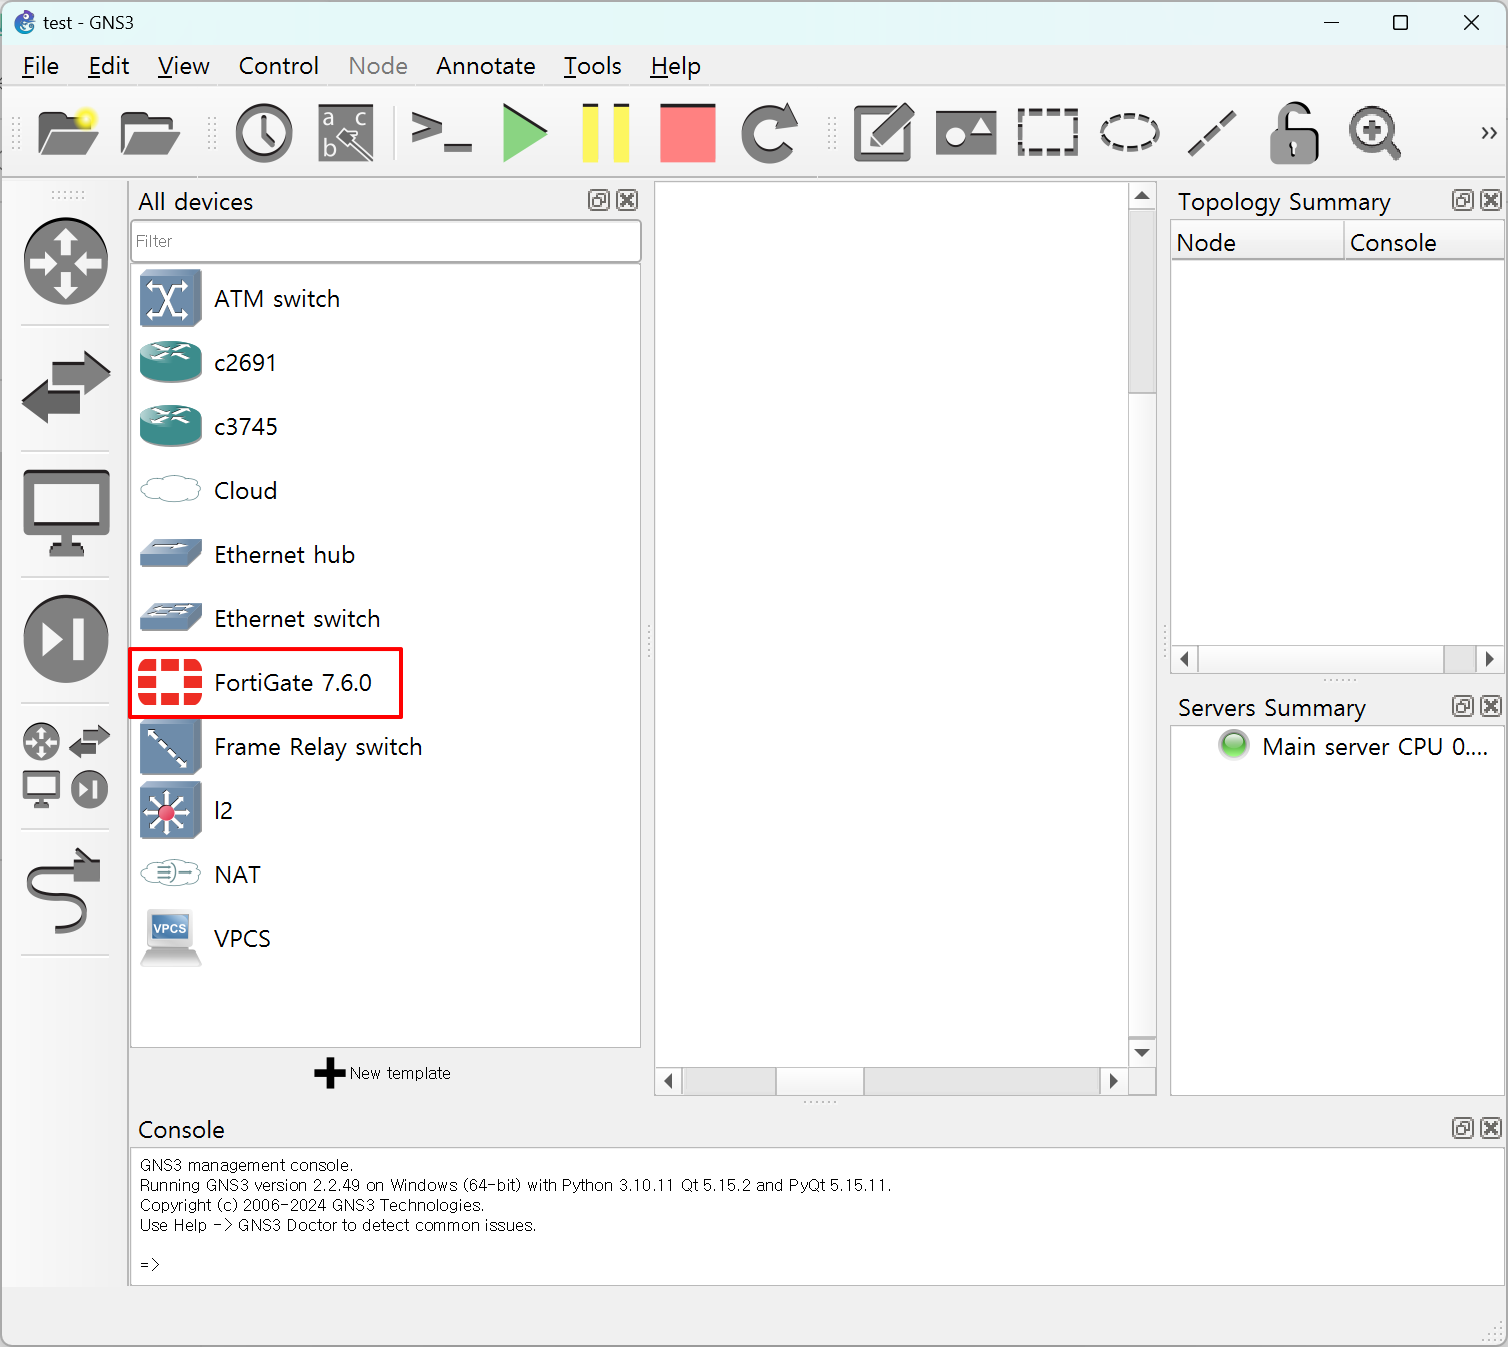
이전 글에서 GNS3에 fortigate를 설치했습니다.

이제 사용해 보겠습니다.

(이 글 작성하는데, 거진 2일 걸렸네요.)


해당 글을 따라서 GNS3를 구성했다면, 이후에는 실제로 업무 환경과 마찬가지로 구색을 갖춰서 방화벽 테스트를 진행할 수 있을 것입니다.

왜 fortigate로 구성을 했냐하면, 많은 회사에서 fortigate 방화벽을 기본으로 사용합니다.

그래서 도움이 됐으면 하는 마음에 fortigate 방화벽 테스트 환경을 구축해 봤습니다.


사전에 아래의 글들을 보고 먼저 이행해 주시기 바랍니다.


proxmox 내부 네트워크 구성하기

https://dirt-spoon.tistory.com/310


proxmox에서 내부 네트워크 추가하기

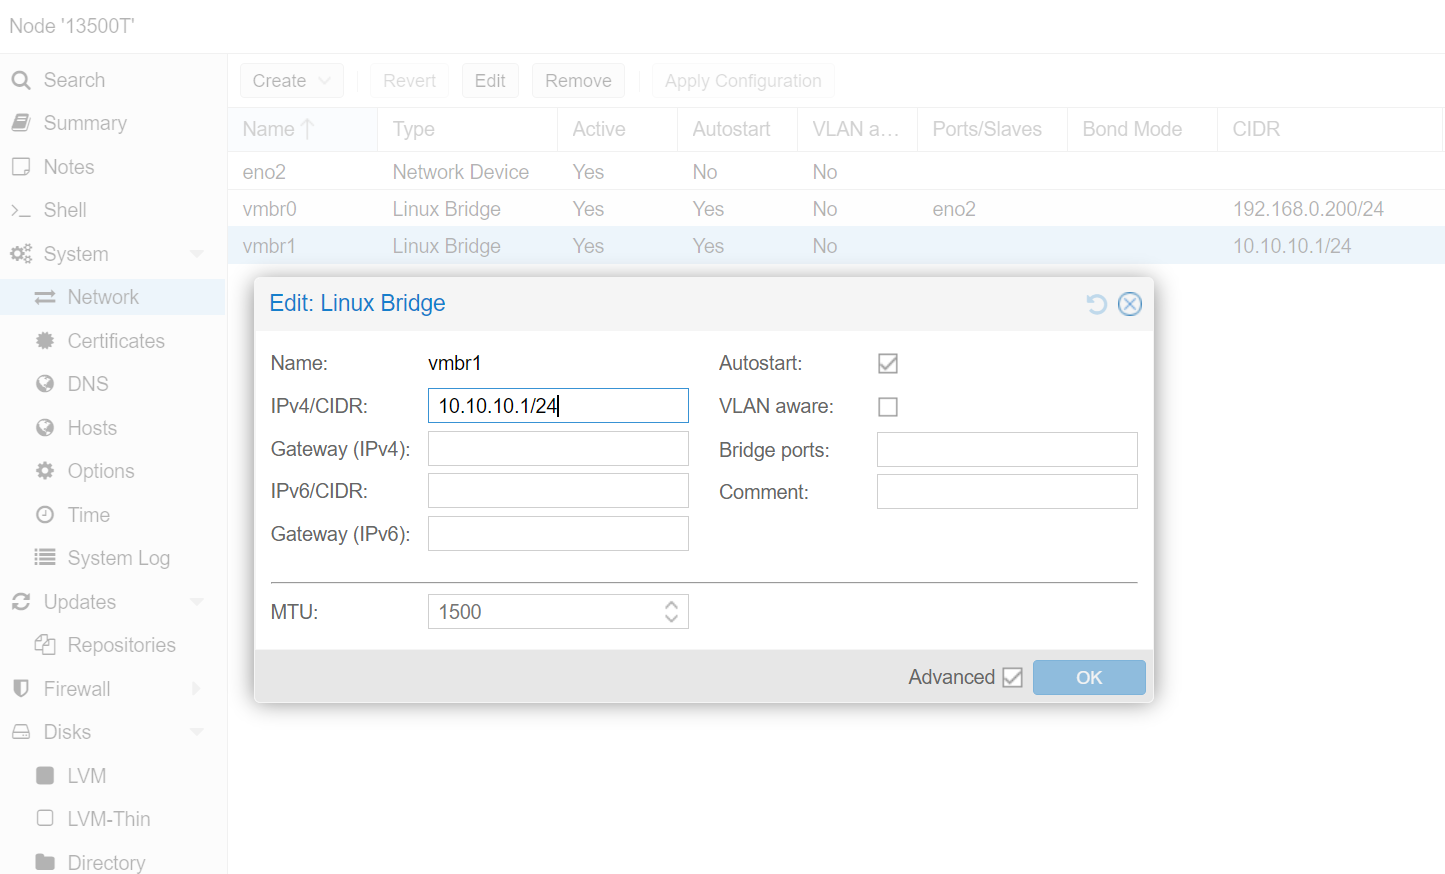
원하는 네트워크의 분리를 위해서 내부 랜을 추가합니다.저 같은 경우에는 GNS3에서 사용할 별도의 랜을 추가하려고 합니다.  IPv4/CIDR 항목에 사용하고 싶은 IP 대역을 입력하면 됩니다.Bridge Ports

dirt-spoon.tistory.com


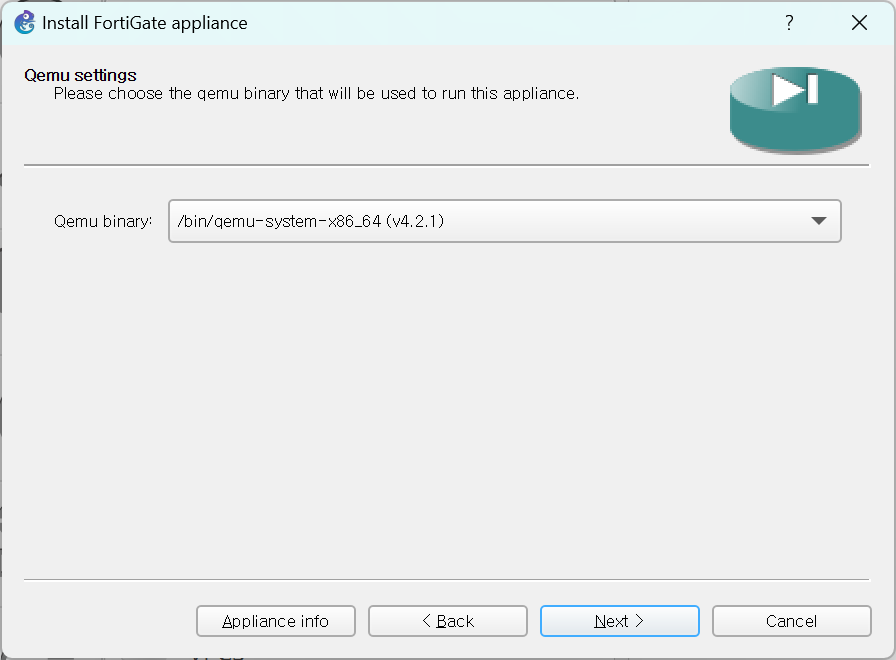
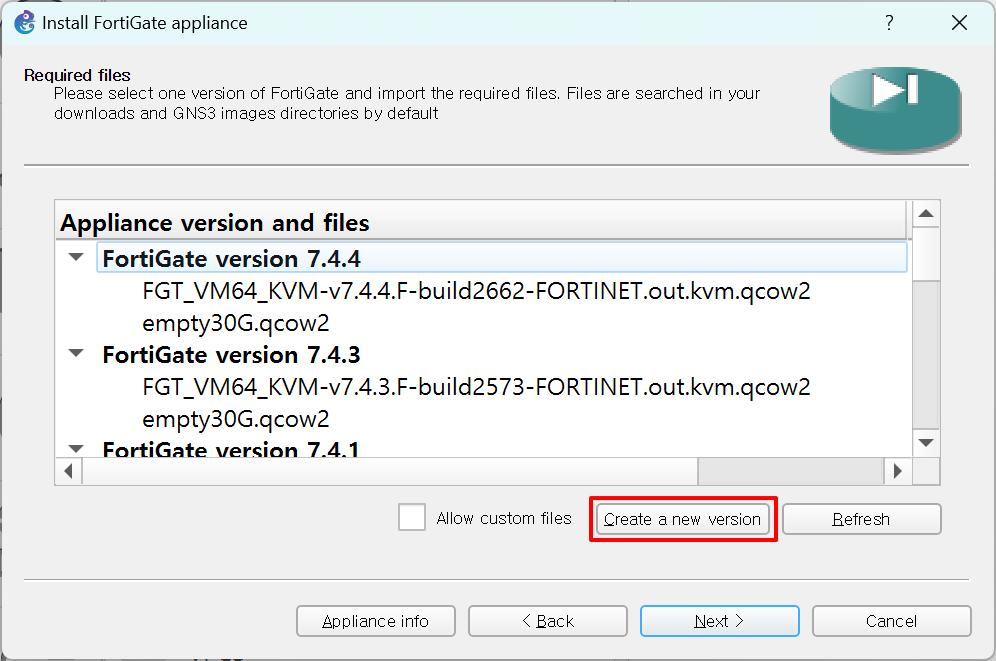
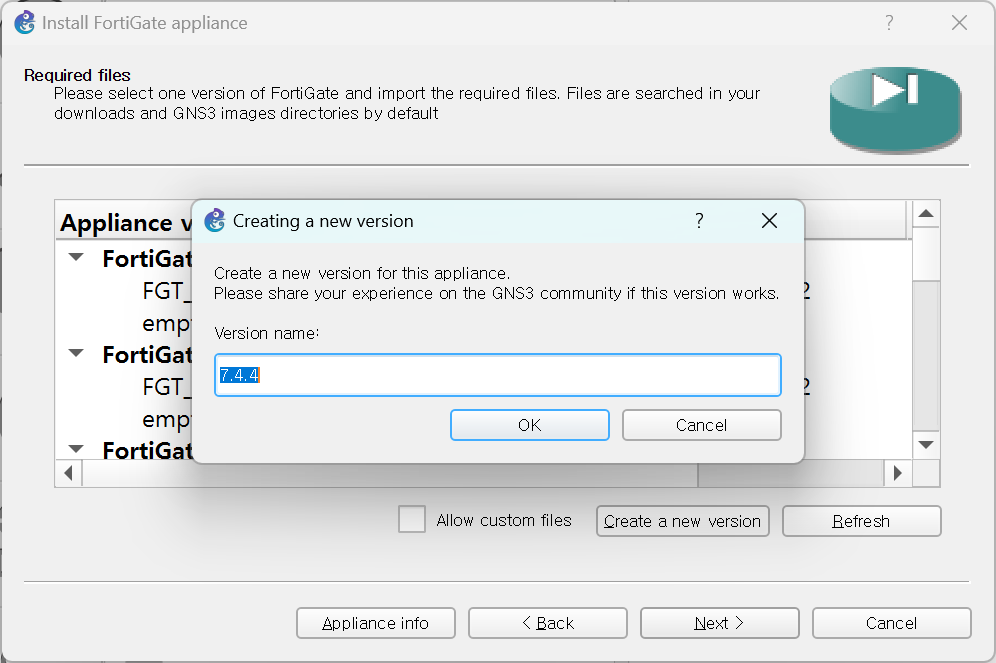
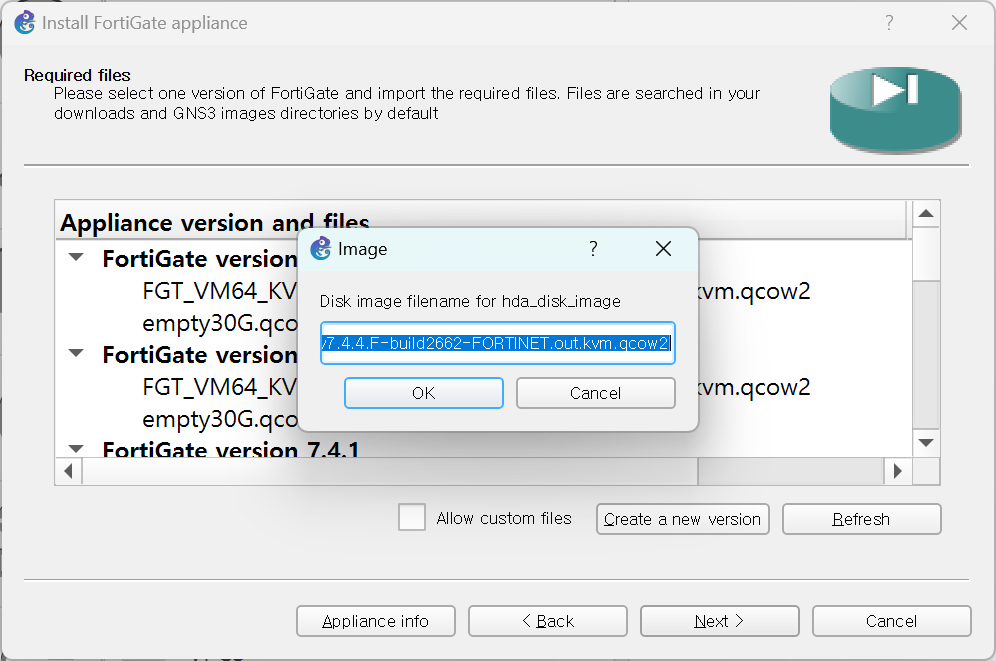
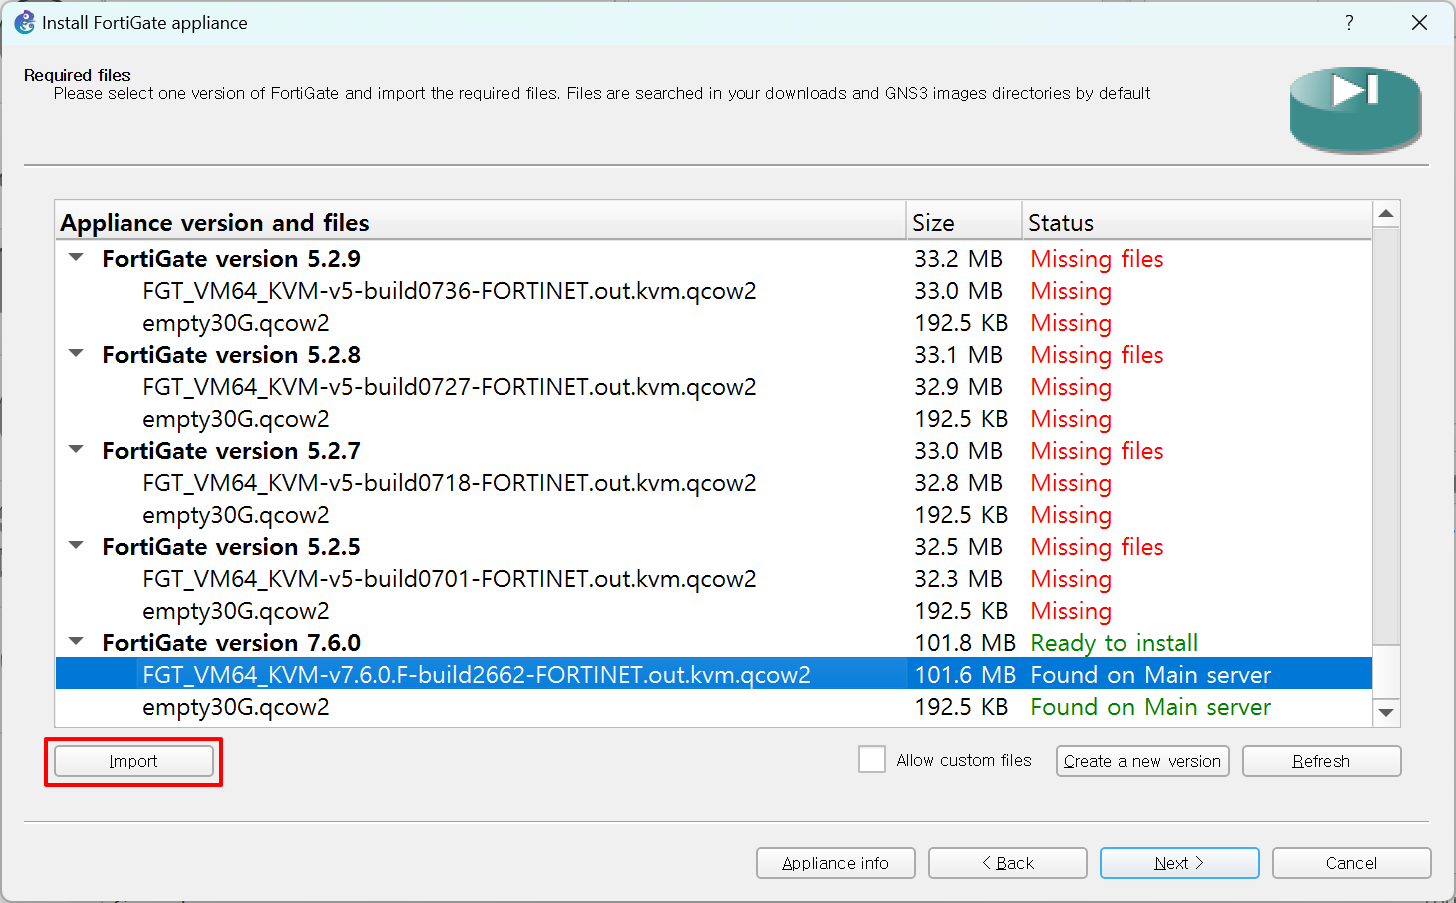
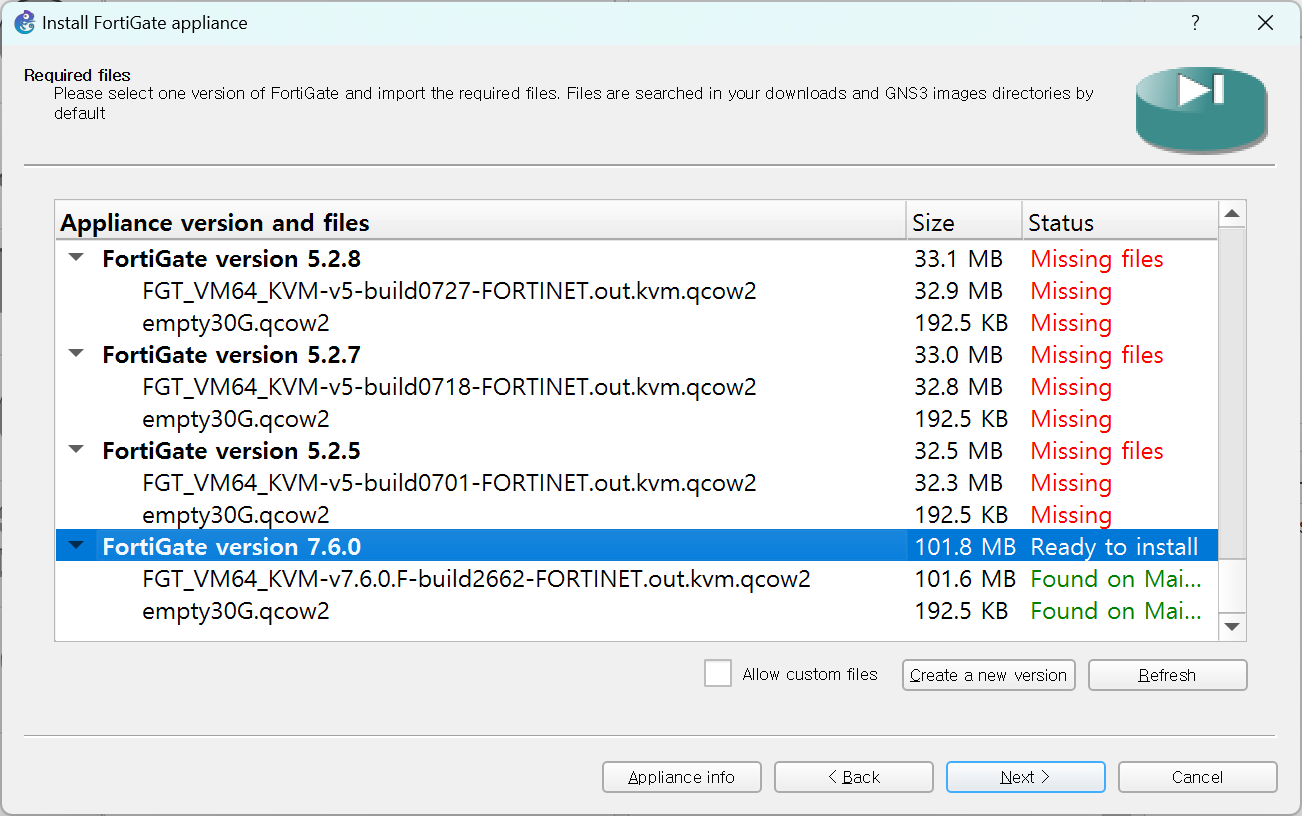
GNS3에 fortigate 설치하기

https://dirt-spoon.tistory.com/311


GNS3에서 fortigate 설치하기

proxmox를 통해서 fortigate 설치를 한 적이 있습니다.(https://dirt-spoon.tistory.com/283 참조)그런데, 저렇게 설치만 하면 테스트 할만한게 거의 없습니다.그래서 제대로 fortigate를 테스트 할 수 있게 GNS3에 f

dirt-spoon.tistory.com


proxmox에 내부 네트워크를 구성했다면 아래 그럼처럼 Cloud를 구성하고, configure를 확인합니다.


아래의 그림처럼 eth0, eth1이 보이면 정상입니다.

아래처럼 보이지 않는다면 GNS3의 서버에서 인터페이스를 추가해줍니다.


GNS3 서버에 인터페이스 추가합니다.

해당 인터페이스의 설정은 proxmox에서 별도로 추가한 vmbr1로 설정을 해줍니다.


proxmox의 인터페이스 vmbr1의 IP 대역도 확인해 두세요. 저는 10.10.10.1/24 입니다.

해당 네트워크 카드가 내부 네트워크의 Gateway가 되는 겁니다.


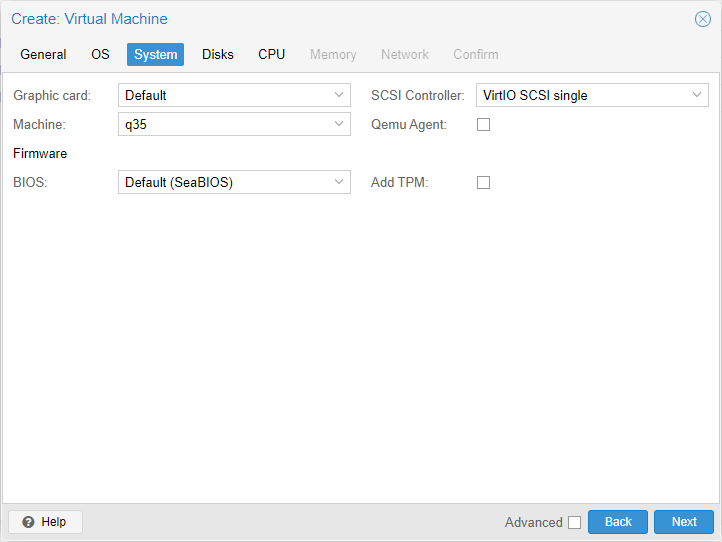
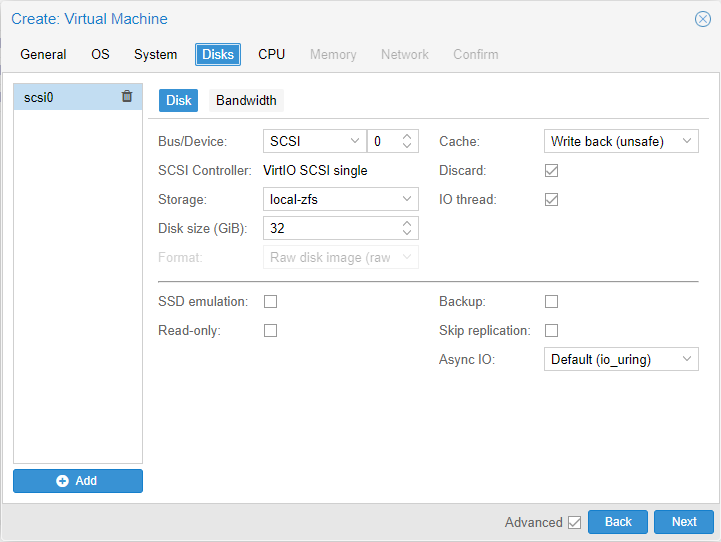
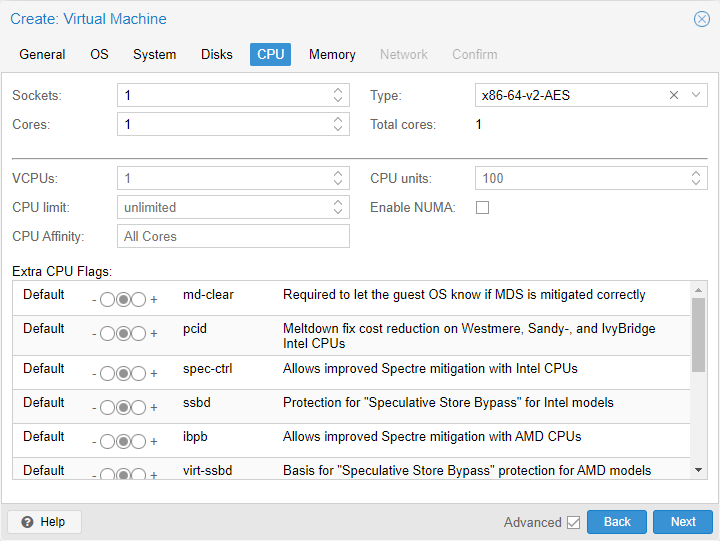
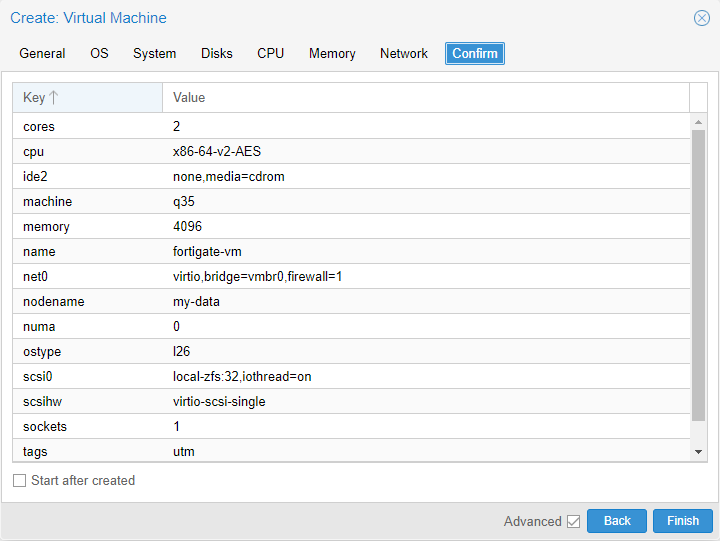
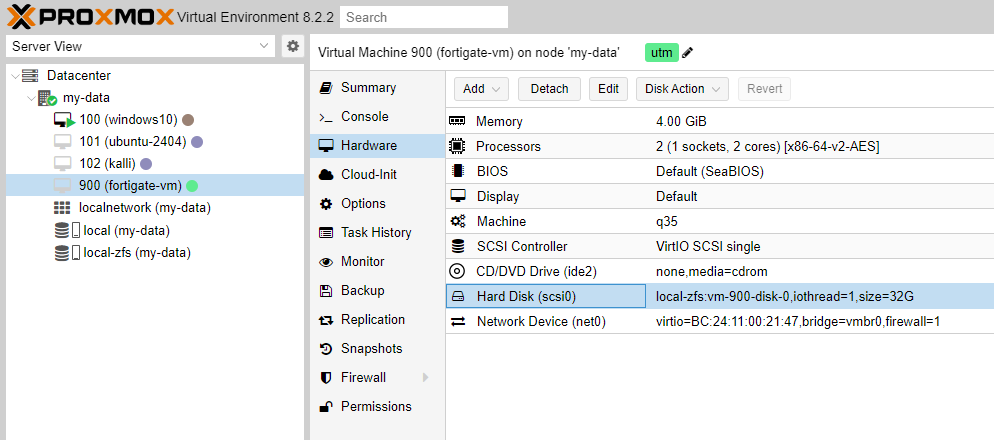
이제 아래의 그림처럼 fortigate를 구성해 줍니다.


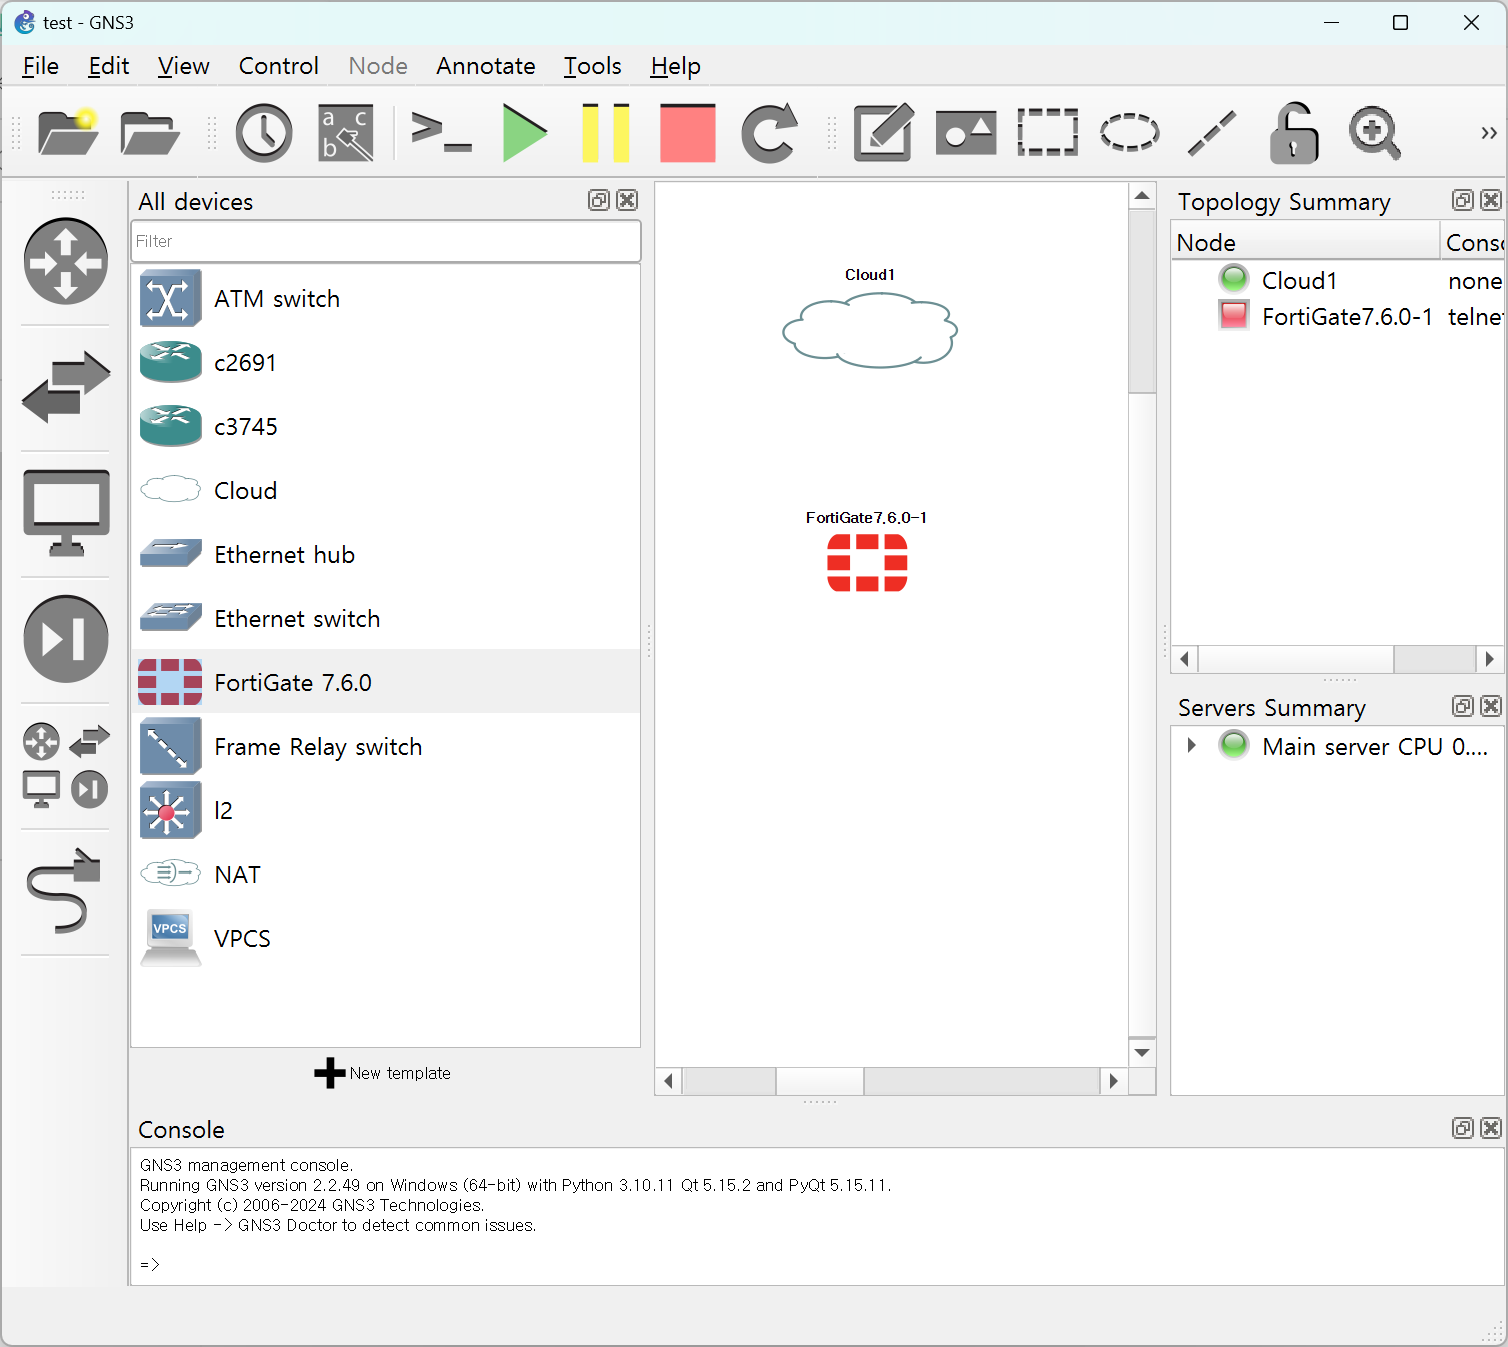
이제 fortigate를 실행해 주고 terminal을 열어줍니다.


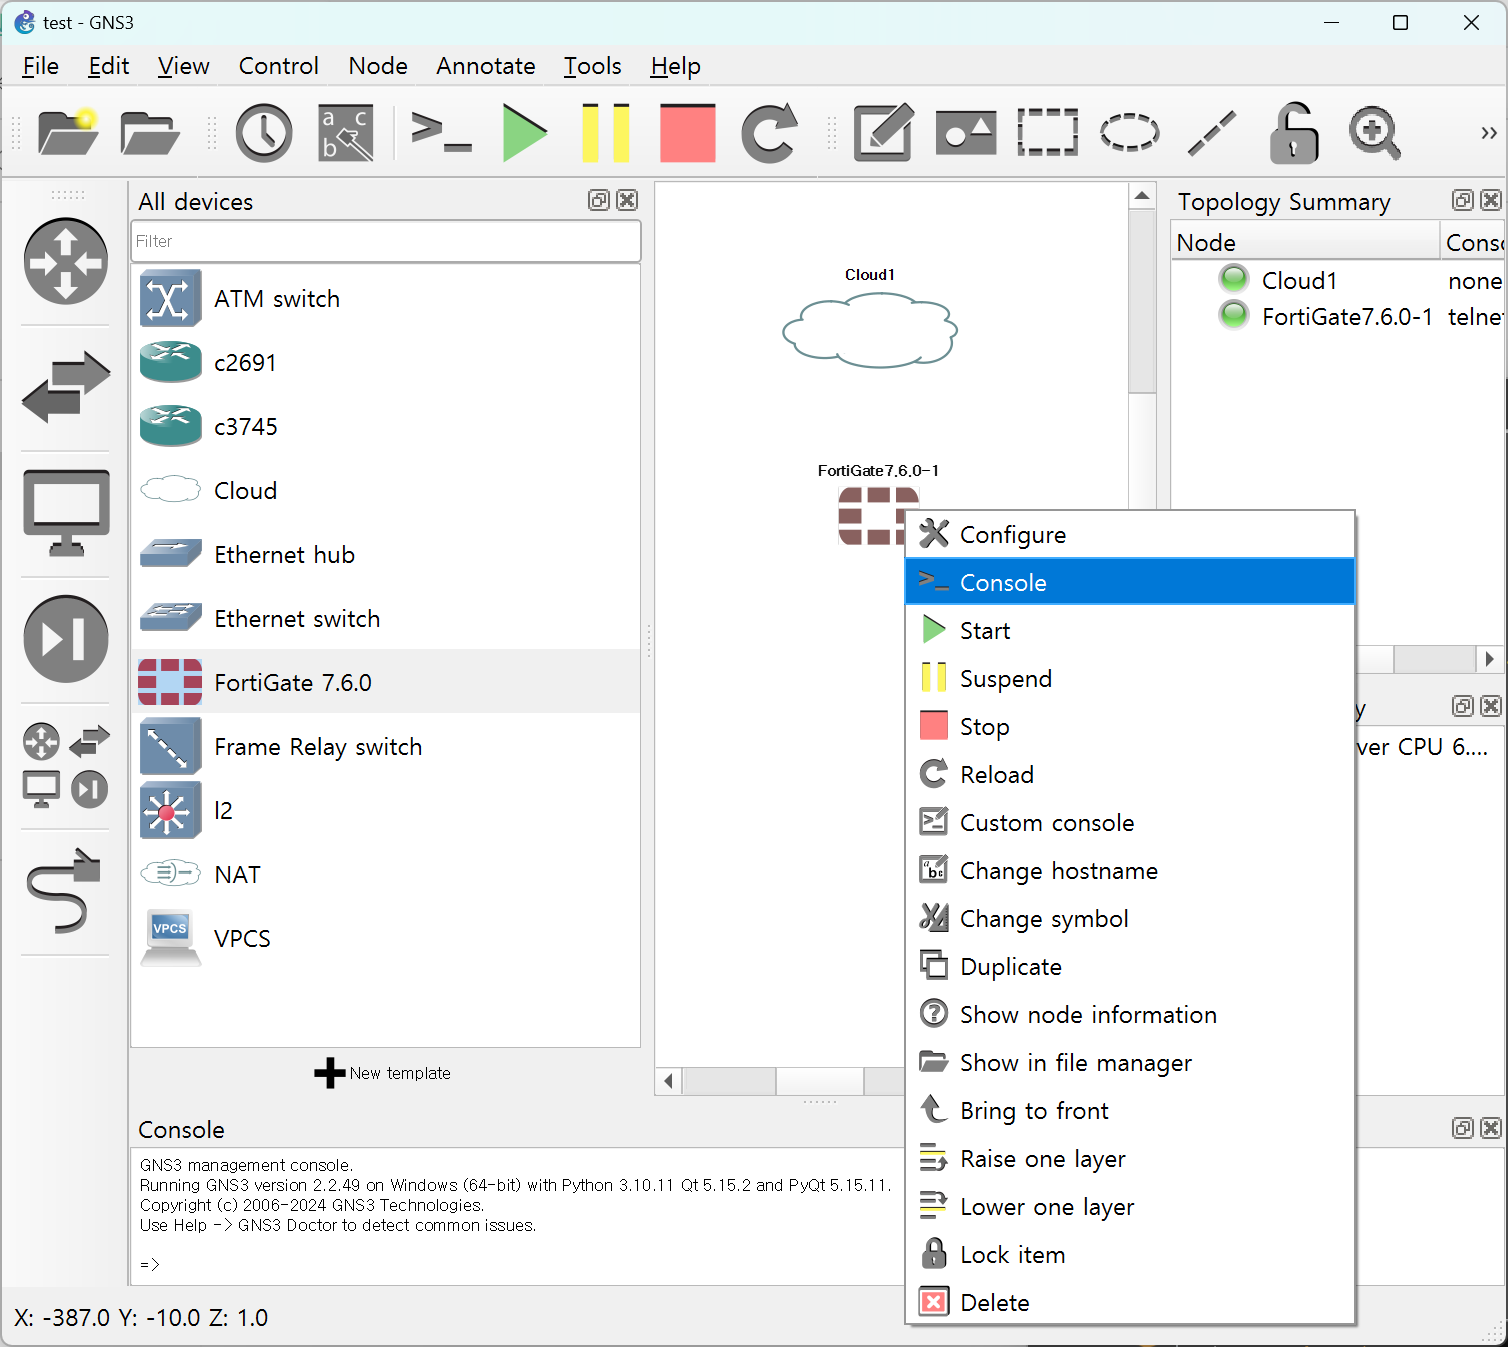
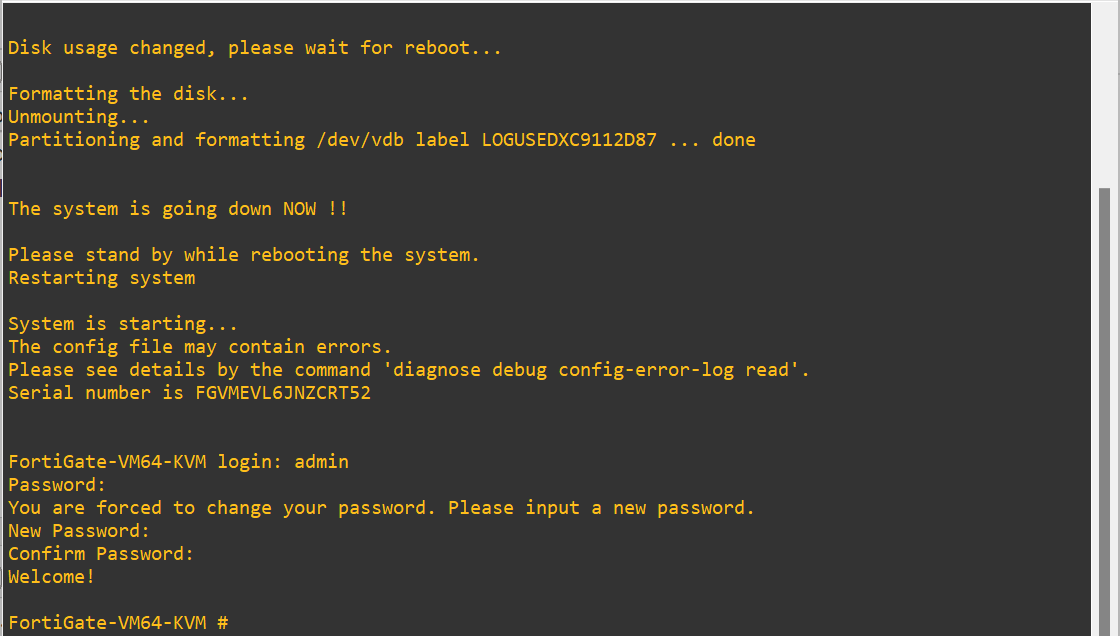
터미널을 보시면 로그인하라고 보입니다.

처음 계정 정보는 아래와 같습니다.

ID: admin

PW: 없음


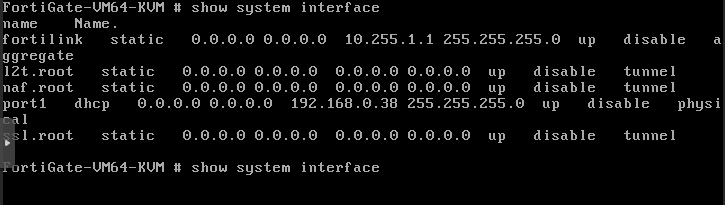
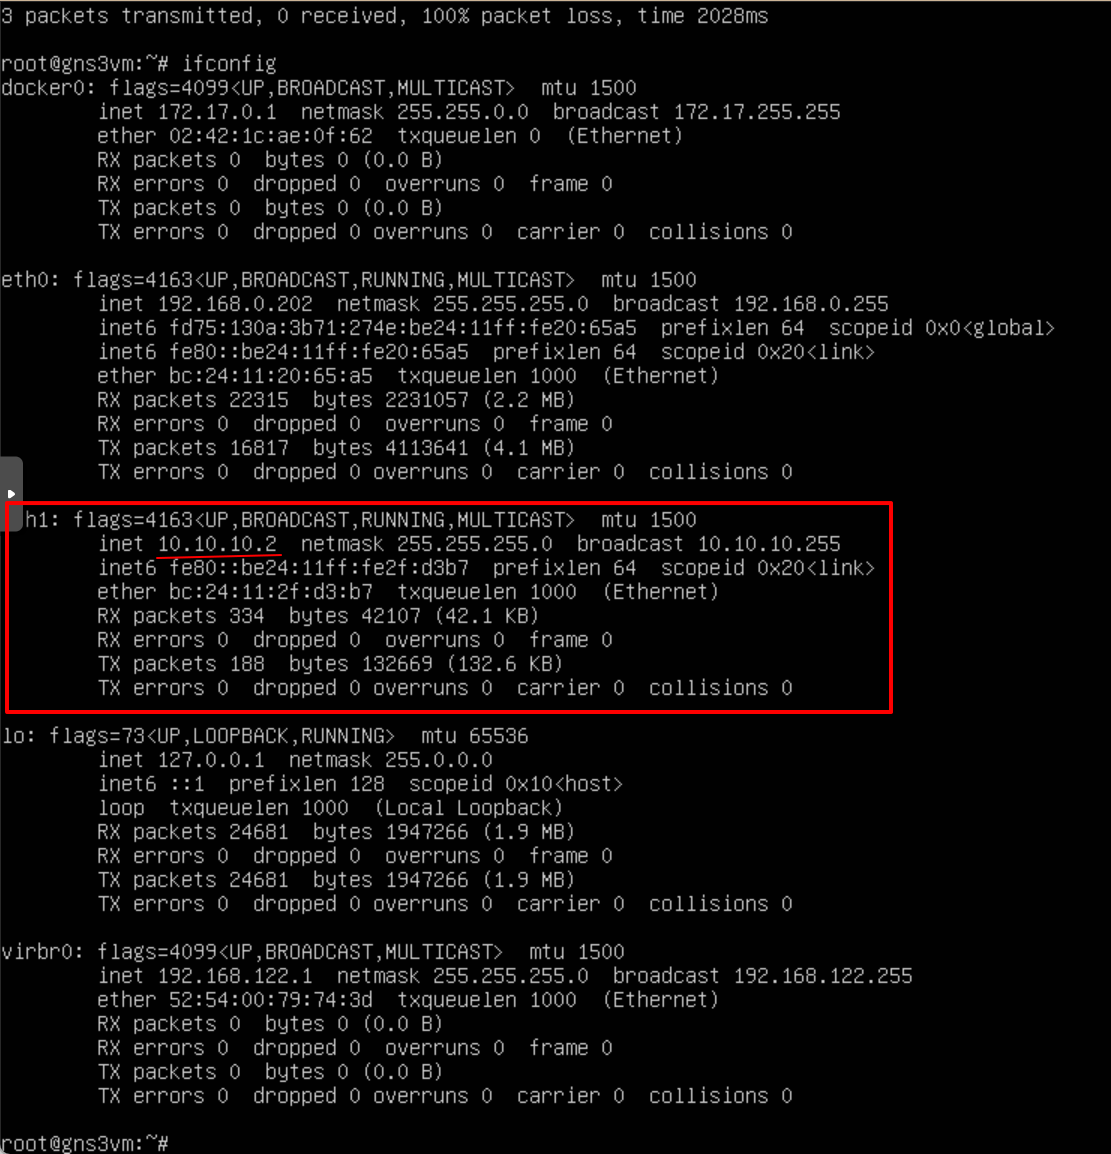
이후 인터페이스 정보를 확인해 줍니다.

명령어는 아래 명령어인데, 실제 fortigate 콘솔에서는 ?가 먹히지 않고 명령어로 실행됩니다.


FortiGate-VM64-KVM # show system interface ?


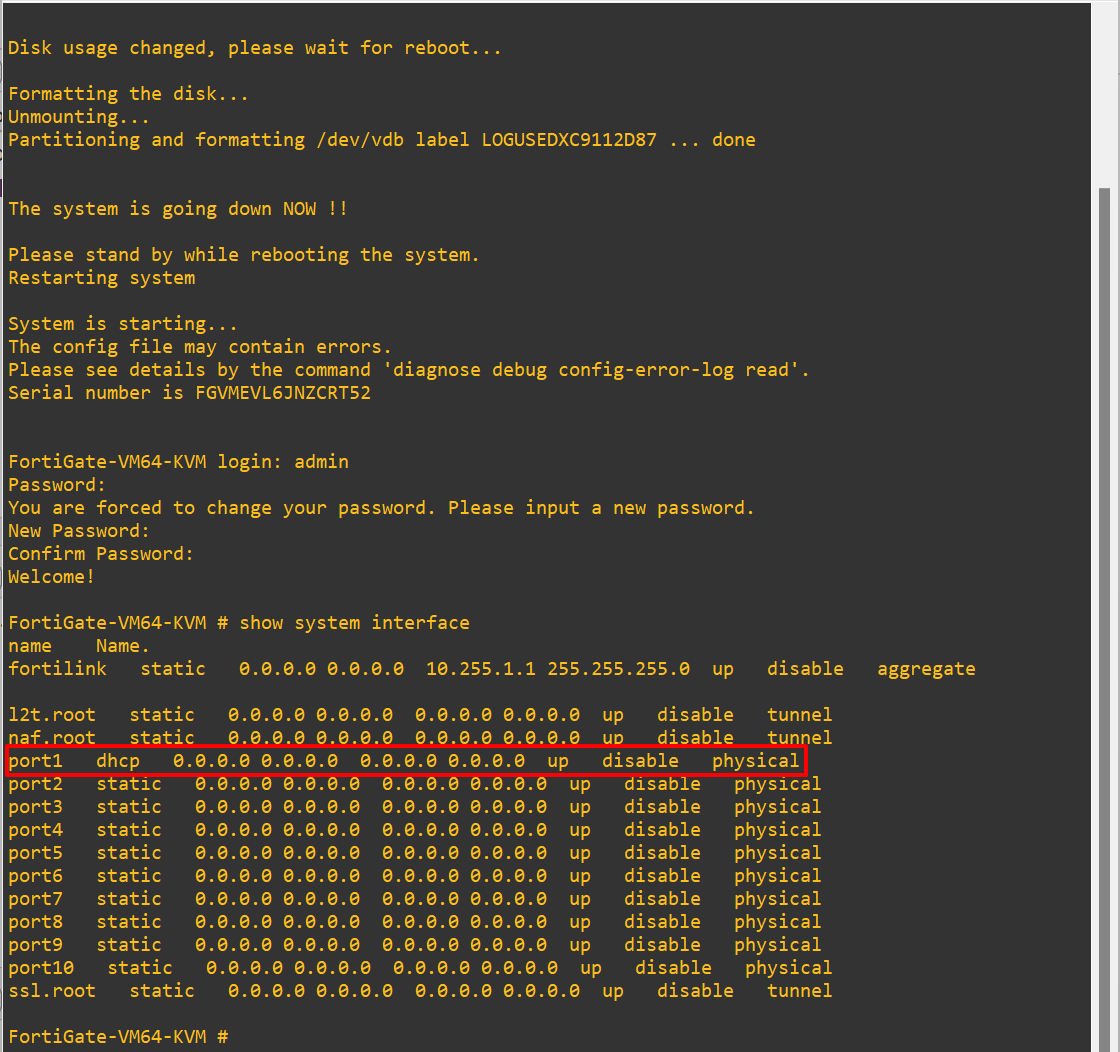
아래 그림처럼 Port1 의 IP를 설정합니다.

FortiGate-VM64-KVM # config system interface
FortiGate-VM64-KVM (interface) # edit port1
FortiGate-VM64-KVM (port1) # set mode static
FortiGate-VM64-KVM (port1) # set ip 10.10.10.202/24
FortiGate-VM64-KVM (port1) # end
FortiGate-VM64-KVM # show system interface


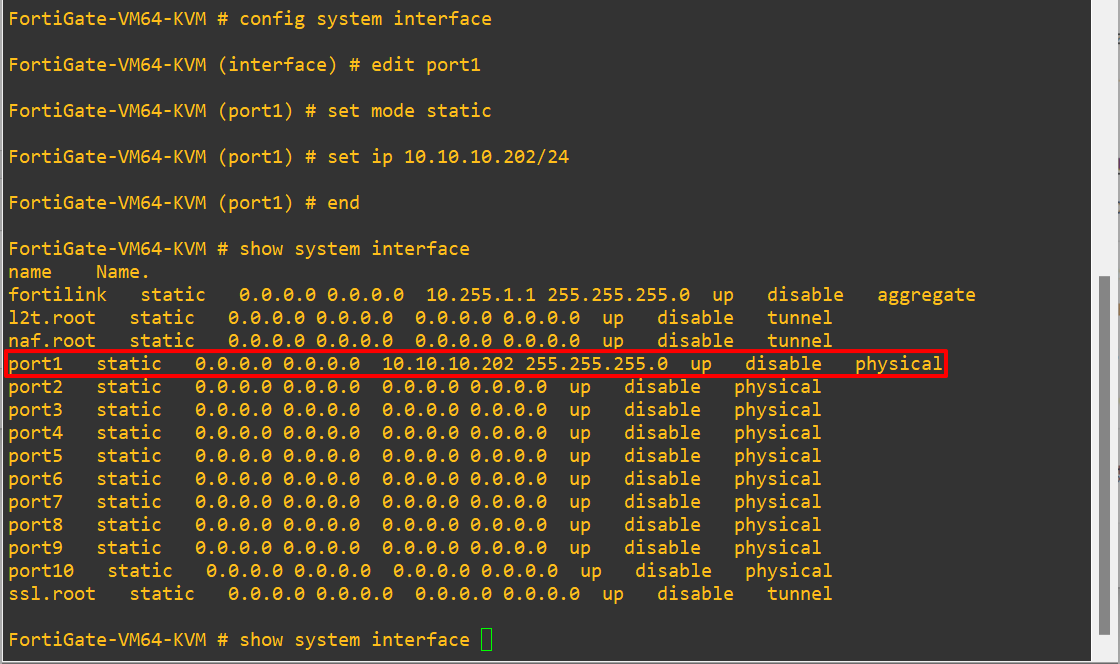
이제 port1에 대한 gateway를 설정해 줘야 합니다.

IP도 GNS3 eth1 인터페이스의 IP가 아니라, proxmox vmbr1의 IP로 설정해 줘야 하네요.

FortiGate-VM64-KVM # config router static
FortiGate-VM64-KVM (static) # edit 1
FortiGate-VM64-KVM (1) # set gateway 10.10.10.1
FortiGate-VM64-KVM (1) # set device port1
FortiGate-VM64-KVM (1) # next
FortiGate-VM64-KVM (static) # show
config router static
    edit 1
        set gateway 10.10.10.1
        set device "port1"
    next
end
FortiGate-VM64-KVM (static) # end
FortiGate-VM64-KVM #


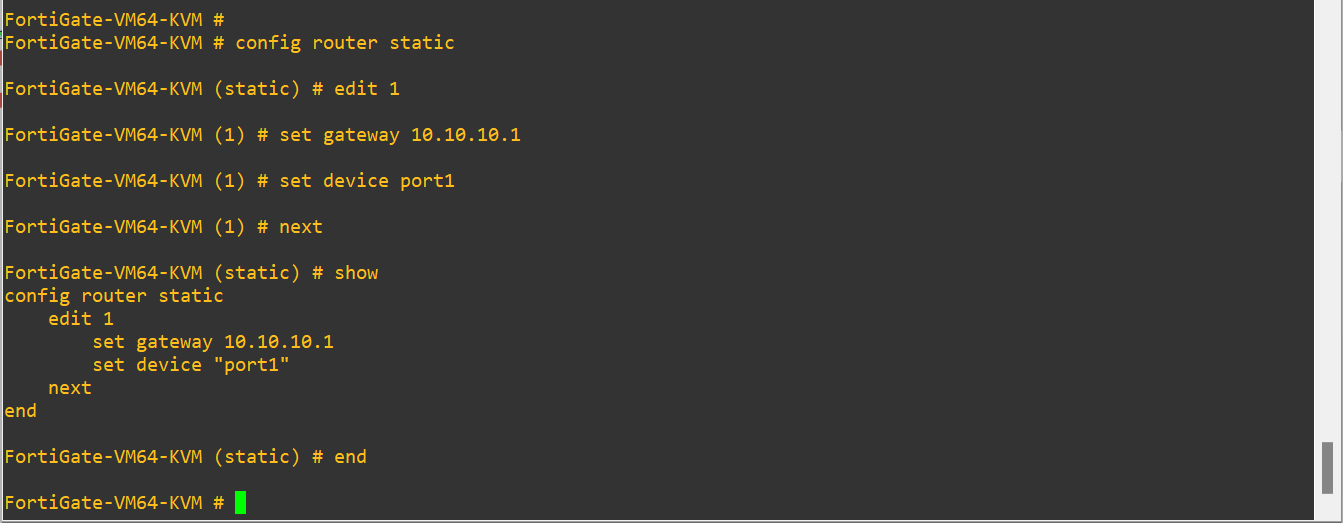
마지막으로 proxmox의 network 설정에 추가가 필요합니다.

아래 글 참고 하셔서 설정해주세요.

https://dirt-spoon.tistory.com/314


내부 네트워크의 NAT 설정

proxmox의 내부 네트워크는 아래 설정을 해야만이 인터넷 통신이 가능합니다. post-up echo 1 > /proc/sys/net/ipv4/ip_forward post-up iptables -t nat -A POSTROUTING -s '10.10.10.0/24' -o vmbr0 -j MASQUERADE post-down iptables -t nat -

dirt-spoon.tistory.com


이제 웹으로 접속해야 하는데요.

여기서 문제가 있습니다.


저는 proxmox 서버로 내부 환경을 구성하려고 하는 것입니다.

그러다보니 proxmox에 윈도우를 별도로 설치한 상황입니다.

한마디로 제 윈도우 서버는 10.10.10.0/24 대역과 통신이 가능한 합니다.

저와 같은 상황일 때에만 10.10.10.0/24 대역의 웹에 접속이 가능합니다.

환경이 저와 같지 않을 경우에는 iptables를 이용하여 port를 forwarding 해서 방화벽의 웹에 접속해야 합니다.


아래의 환경은 proxmox의 윈도우서버에서 10.10.10.0/24 대역을 접속하기 위한 방법입니다.

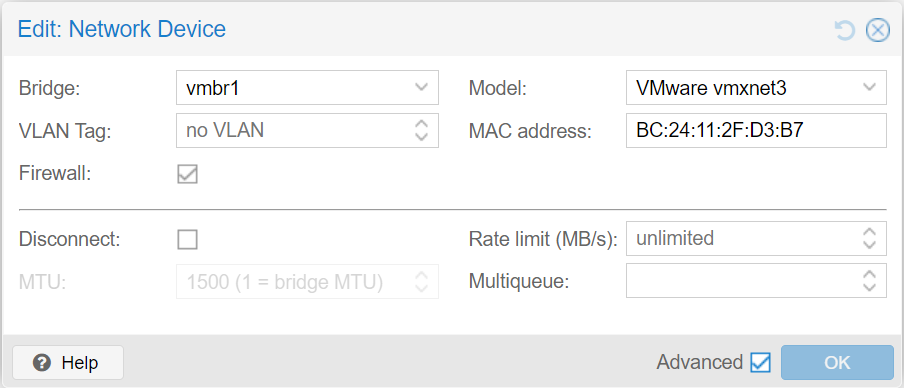
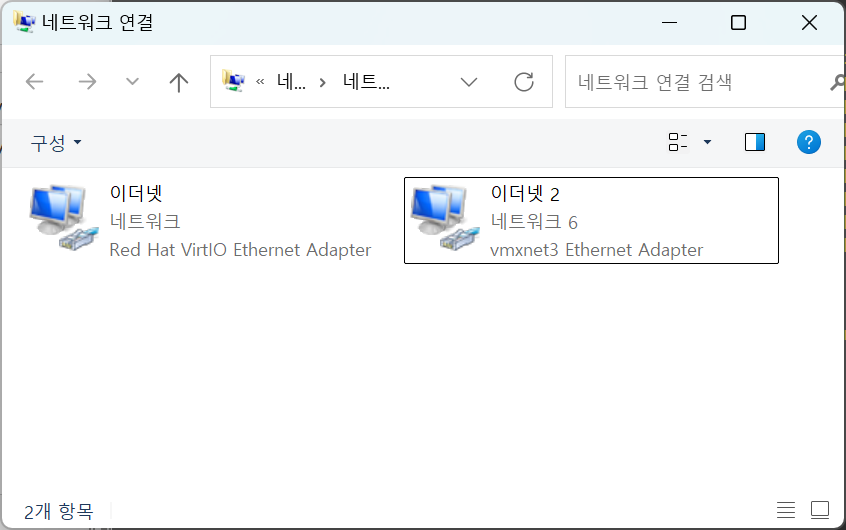
proxmox의 윈도우 서버에 네트워크 디바이스를 아래와 같이 추가해 줍니다.


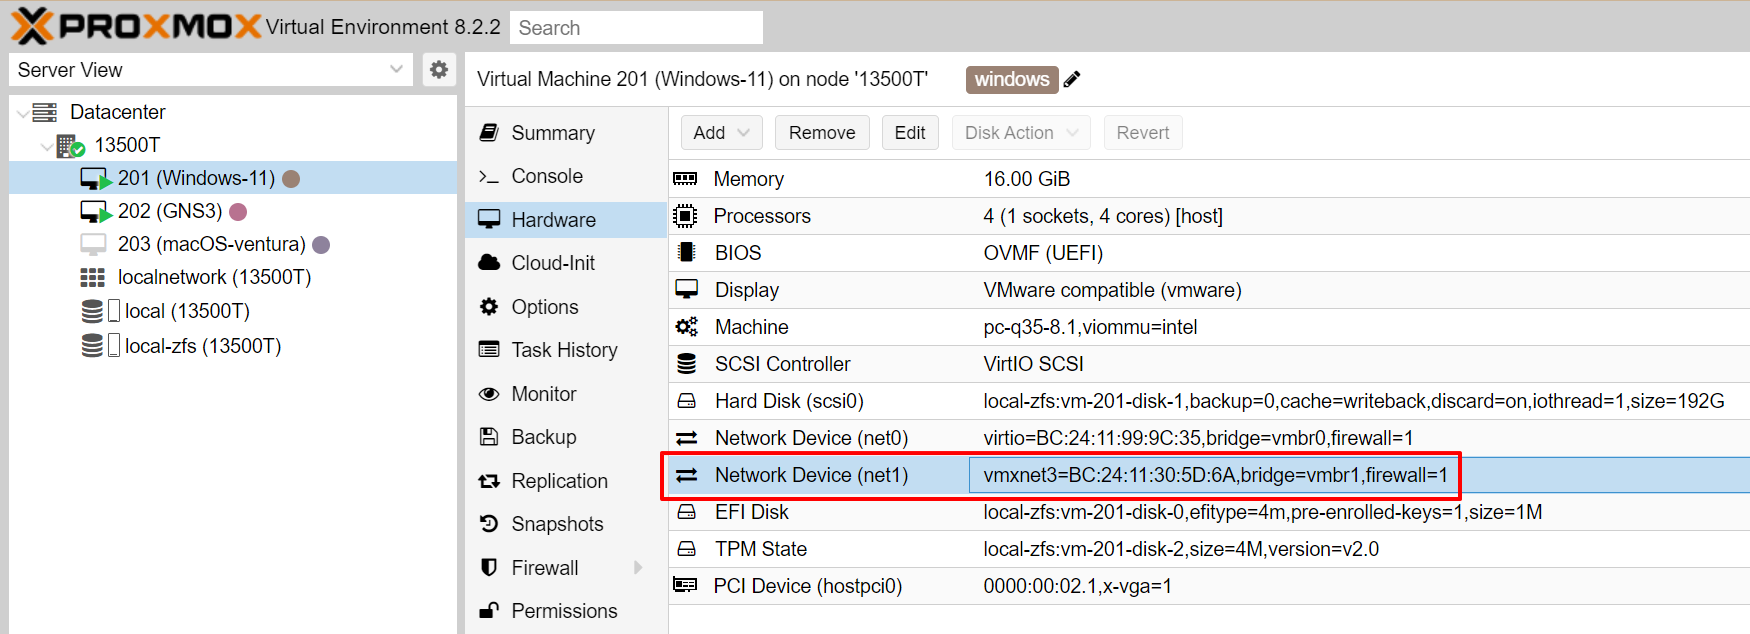
윈도우에 네트워크 카드가 자동으로 하나 생성이 됩니다.
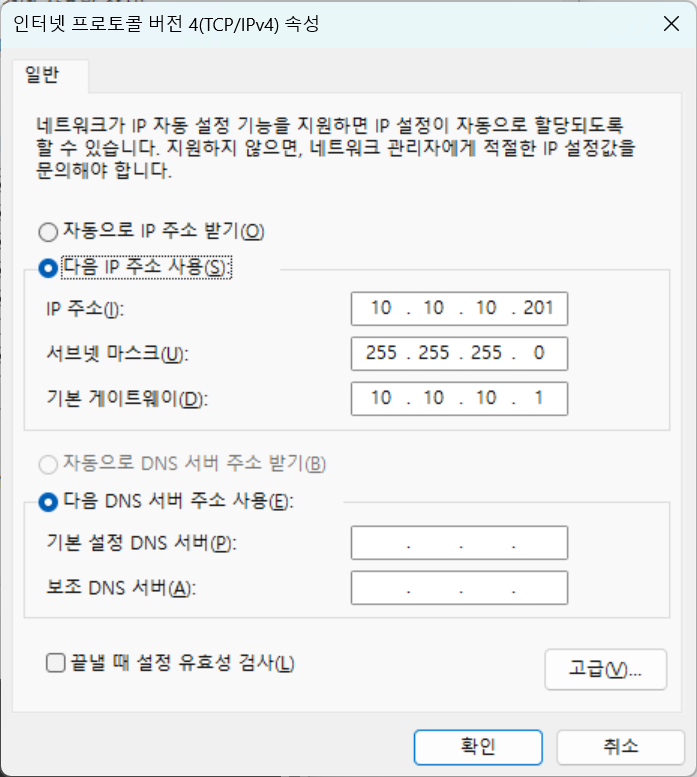
IP를 수동으로 넣어주세요.


이후 윈도우에서 10.10.10.1로 ping 해보시면 아래와 같이 통신이 되는 것을 확인할 수 있습니다.


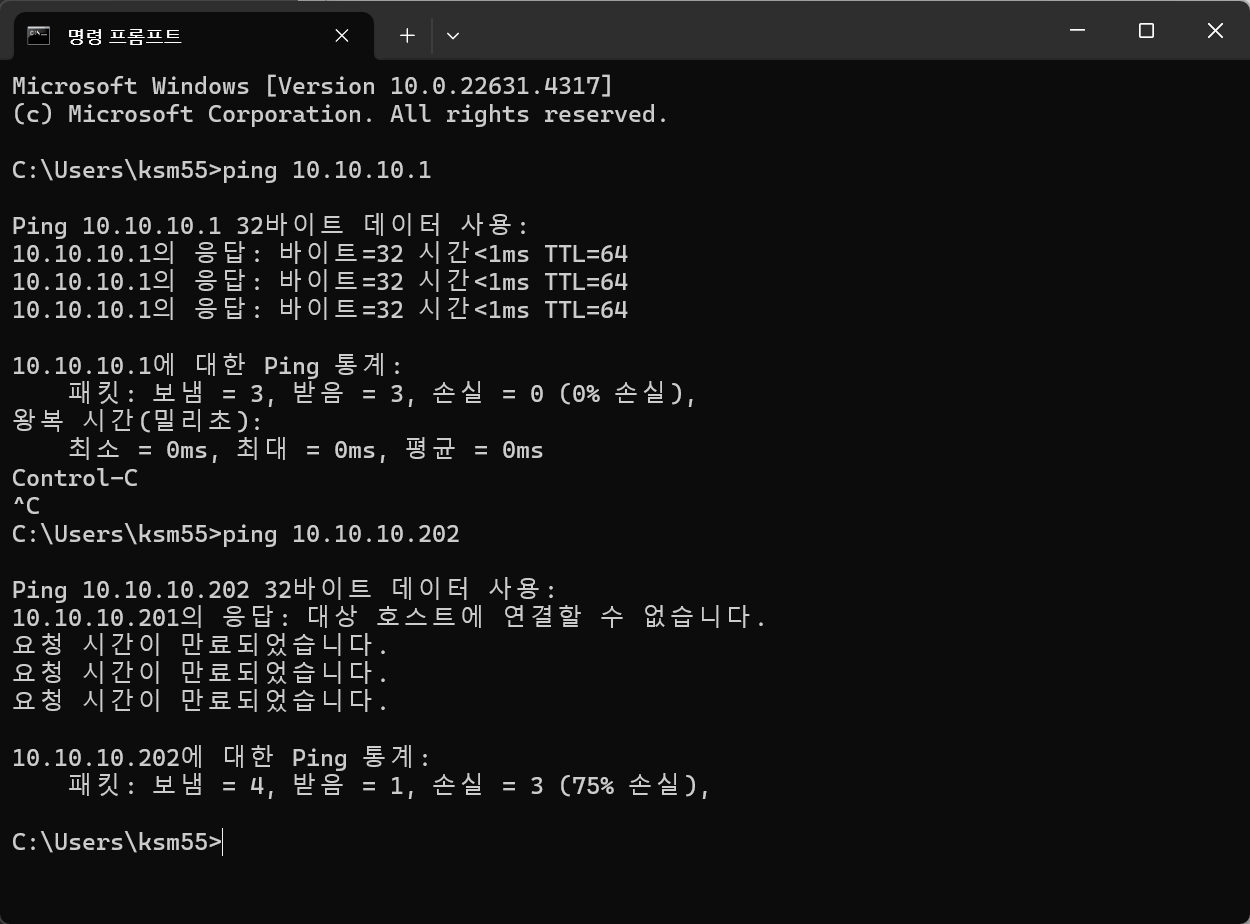
그런데 IP 10.10.10.202로는 ping이 되지 않네요??

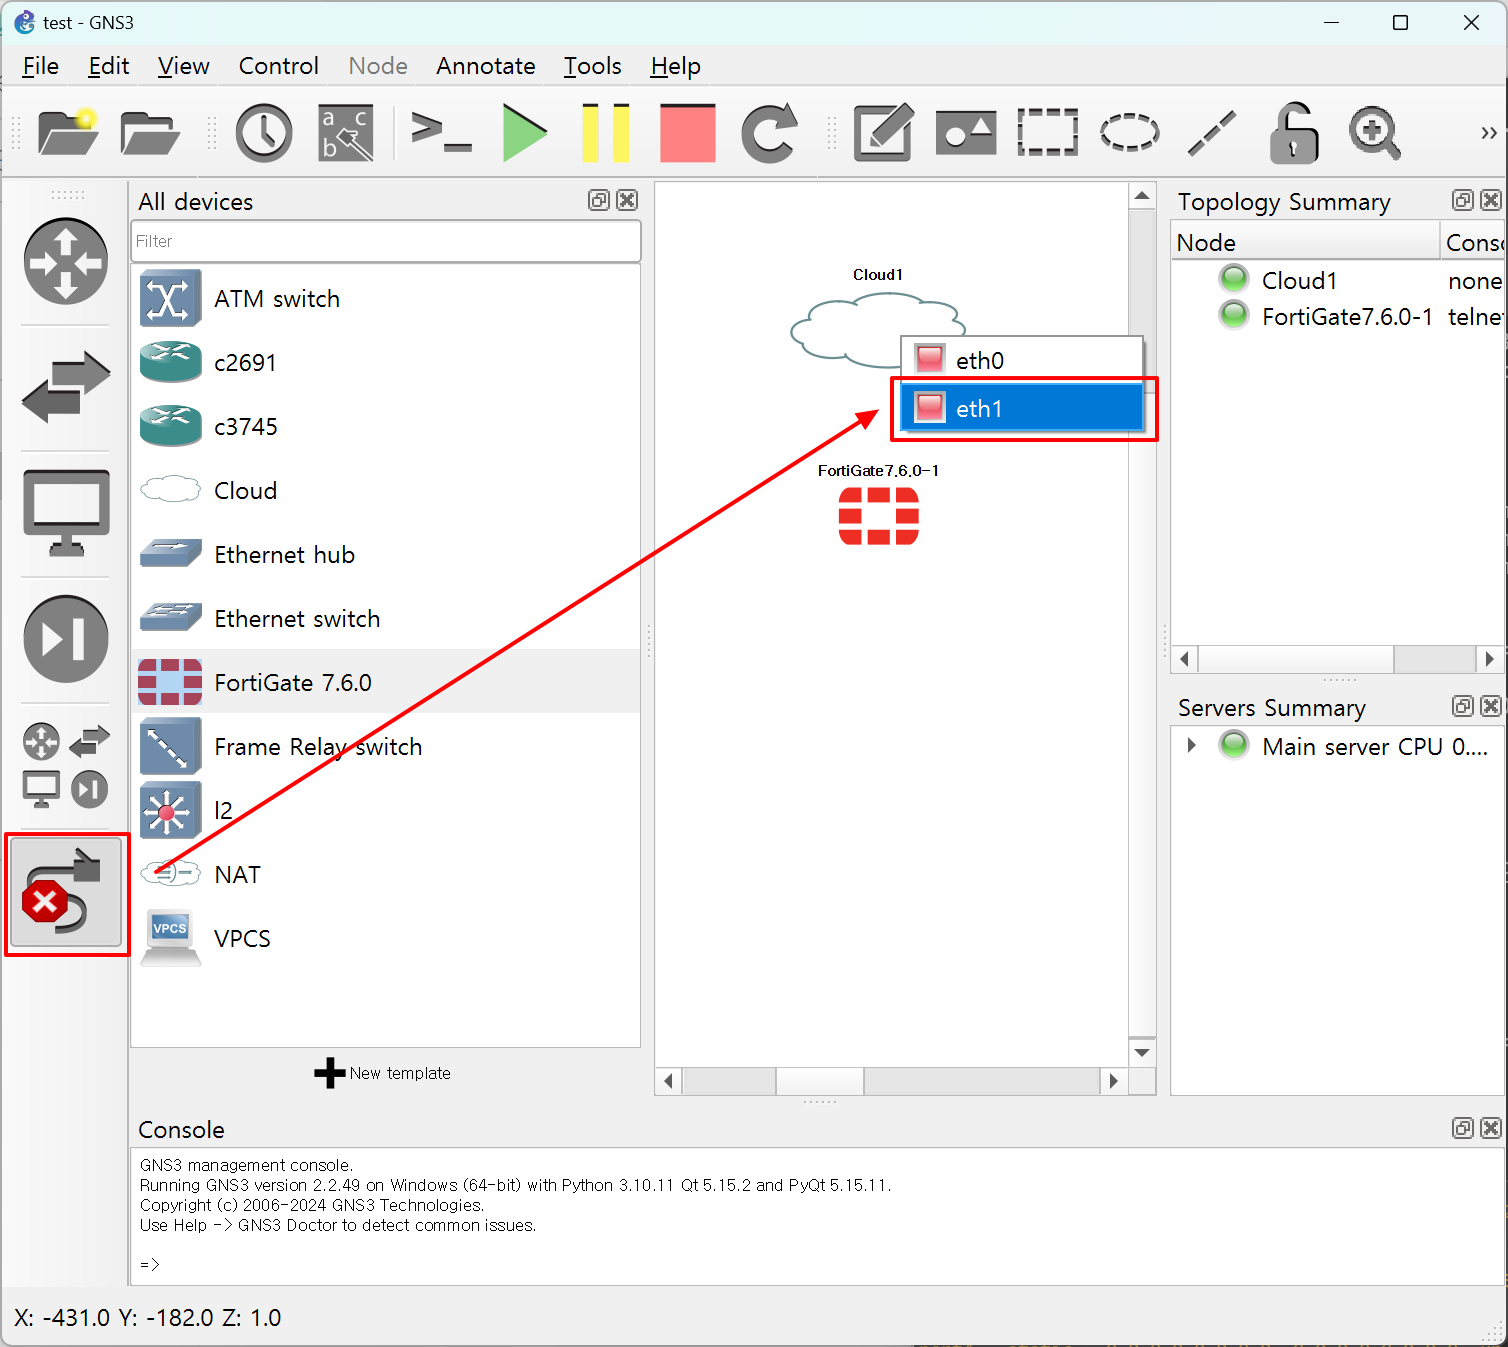
GNS3 구성을 보면, 아직 선이 연결이 되어 있지 않습니다.
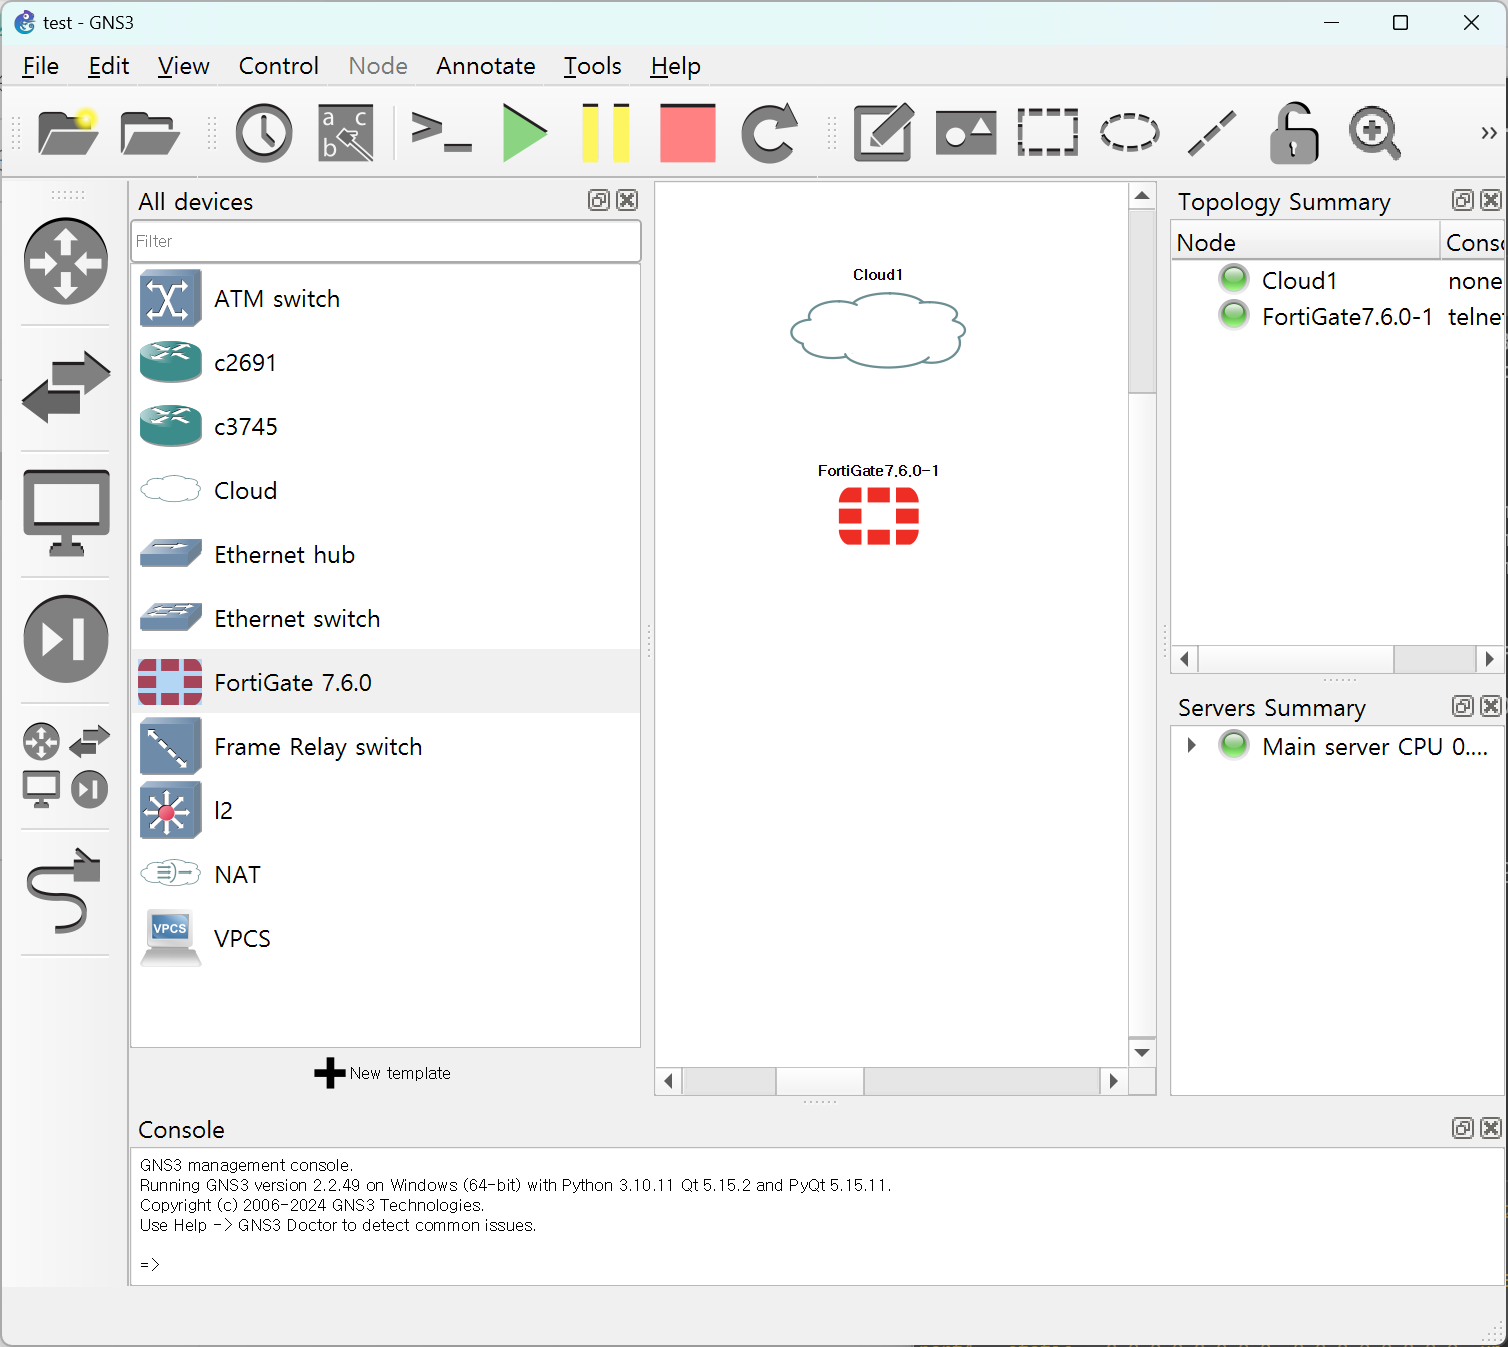
 

선을 연결해 줍니다.

Cloud1에서 GNS3 내부 네트워크 IP를 가진 eth1을 선택해 줍니다.


GNS3에 eth1를 추가하라는 것은 아래 글을 참조하세요.

https://dirt-spoon.tistory.com/313


fortigate는 Port1에 설정을 했기 때문에 Port1를 선택해주면 됩니다.


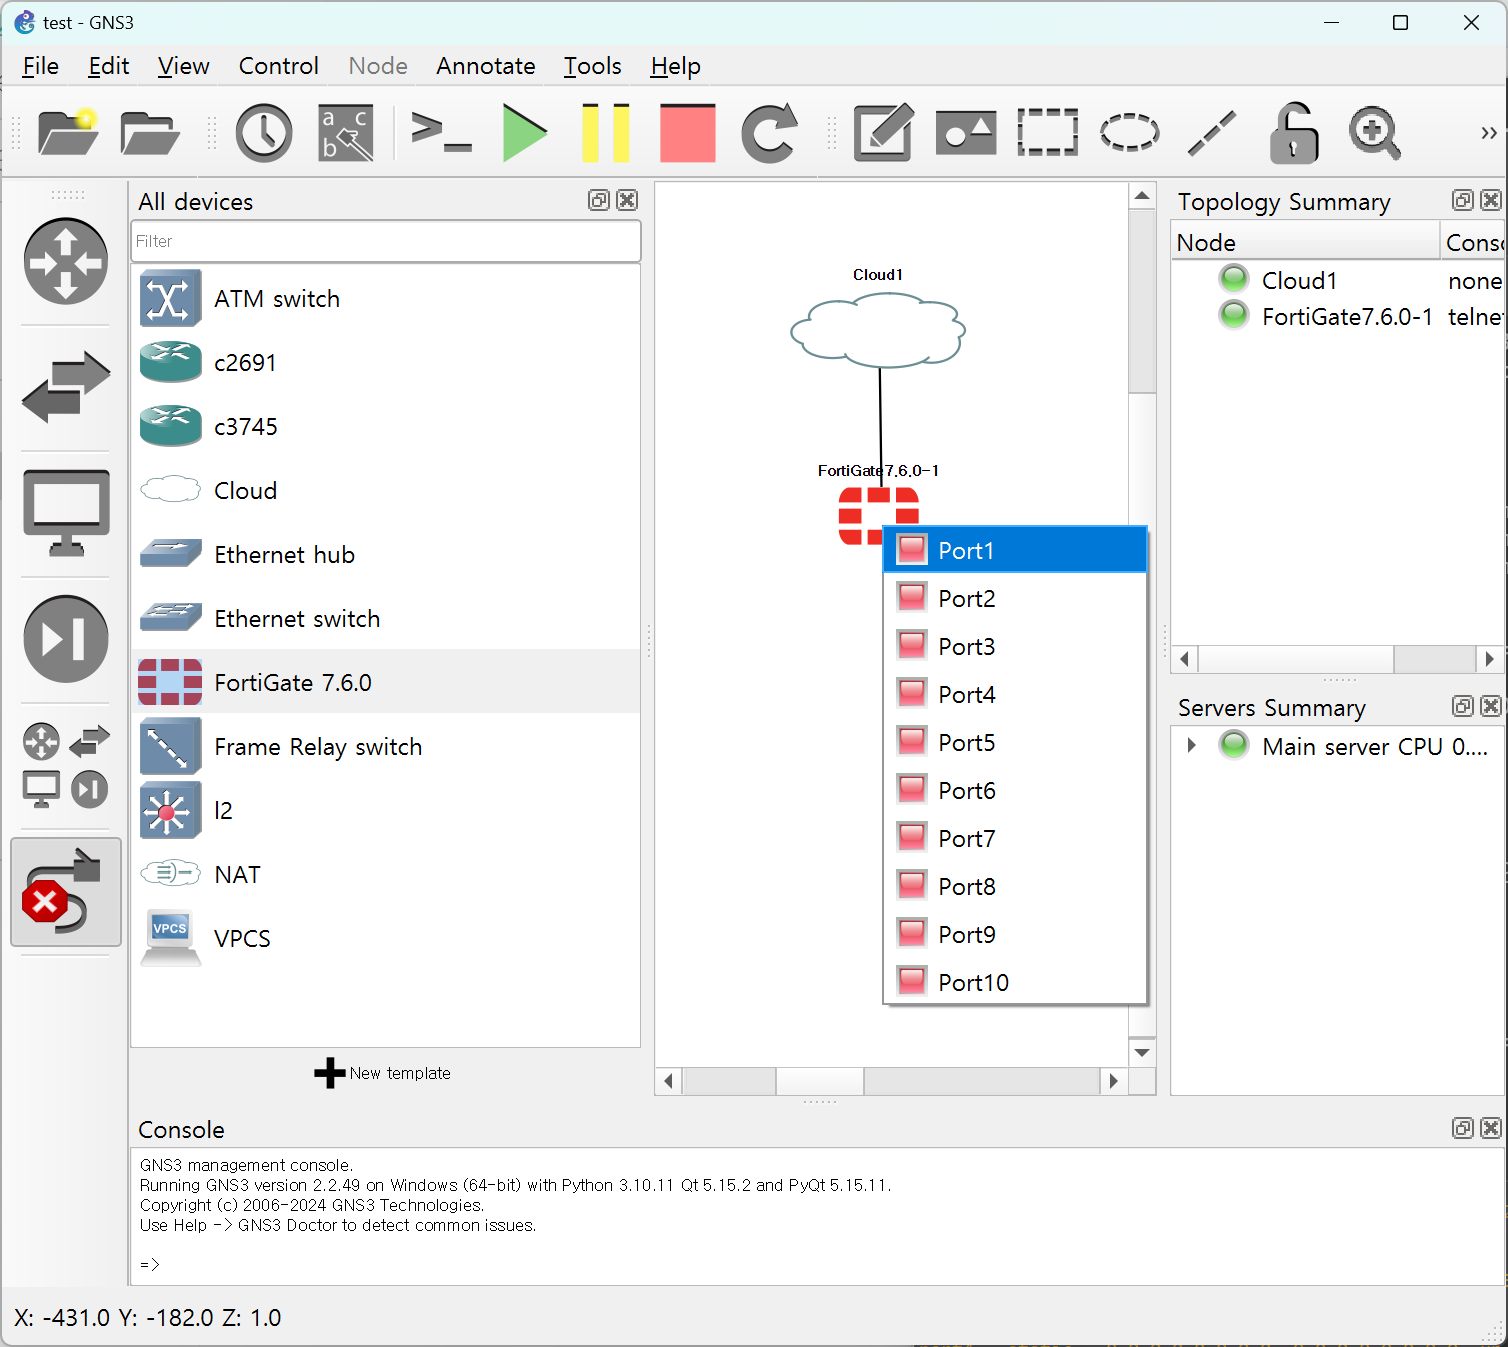
이후 윈도우에서 ping을 날리면~~ 정상적으로 통신이 되는 것을 확인할 수 있습니다.
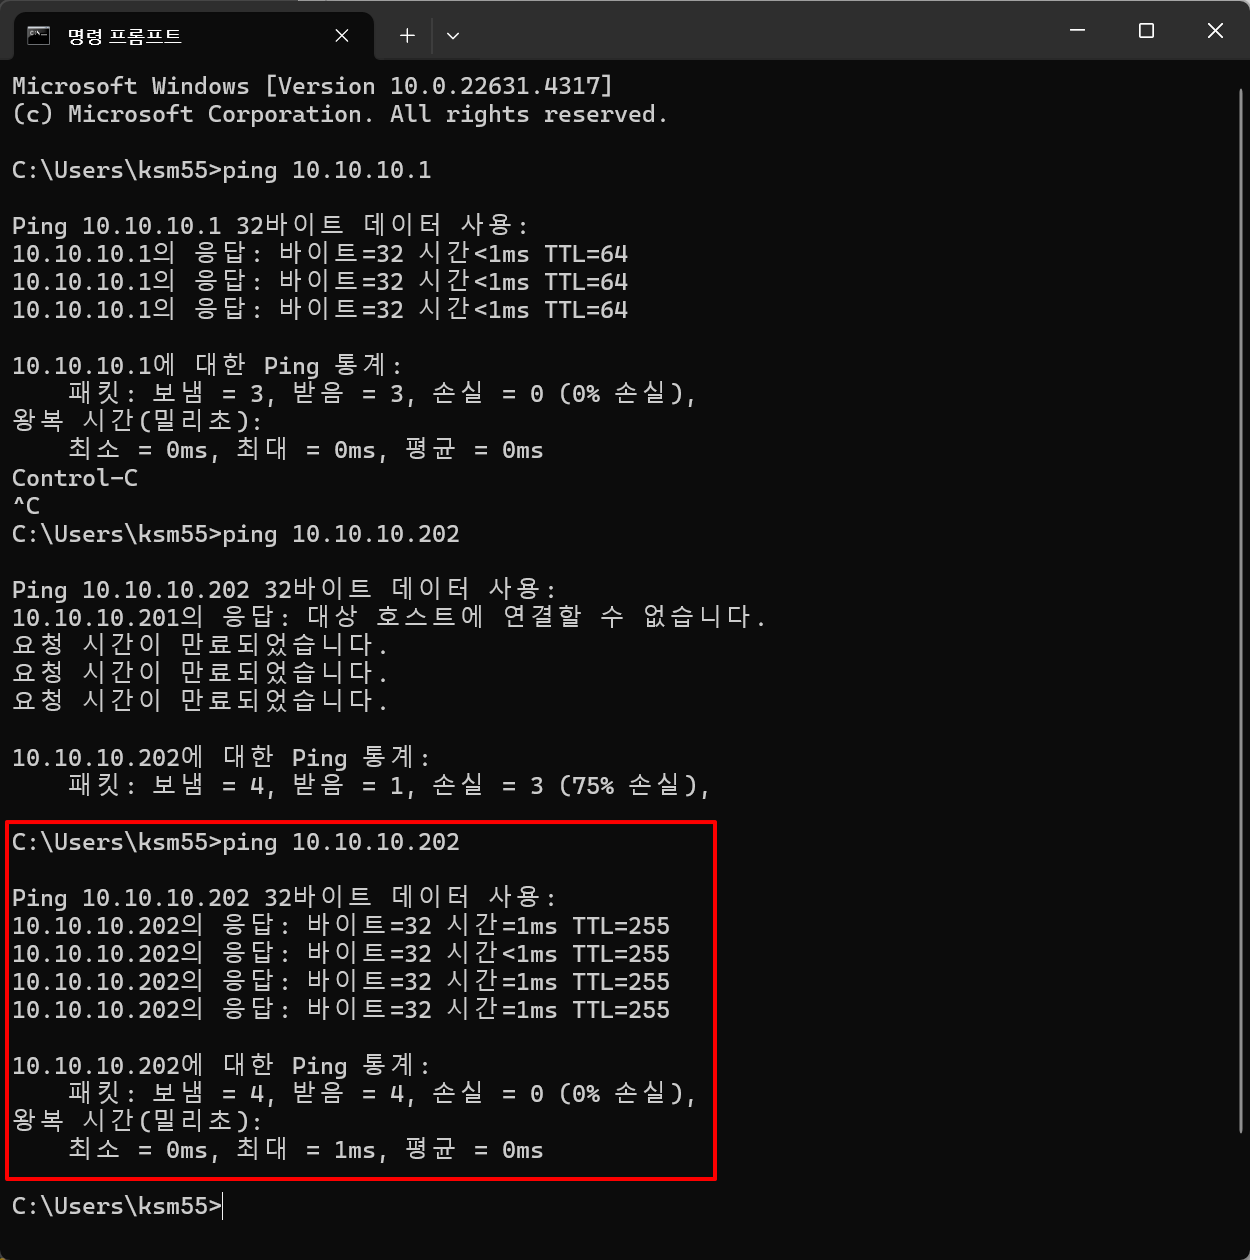
 

이제 웹페이지로 접속해 봅니다.

https://10.10.10.202

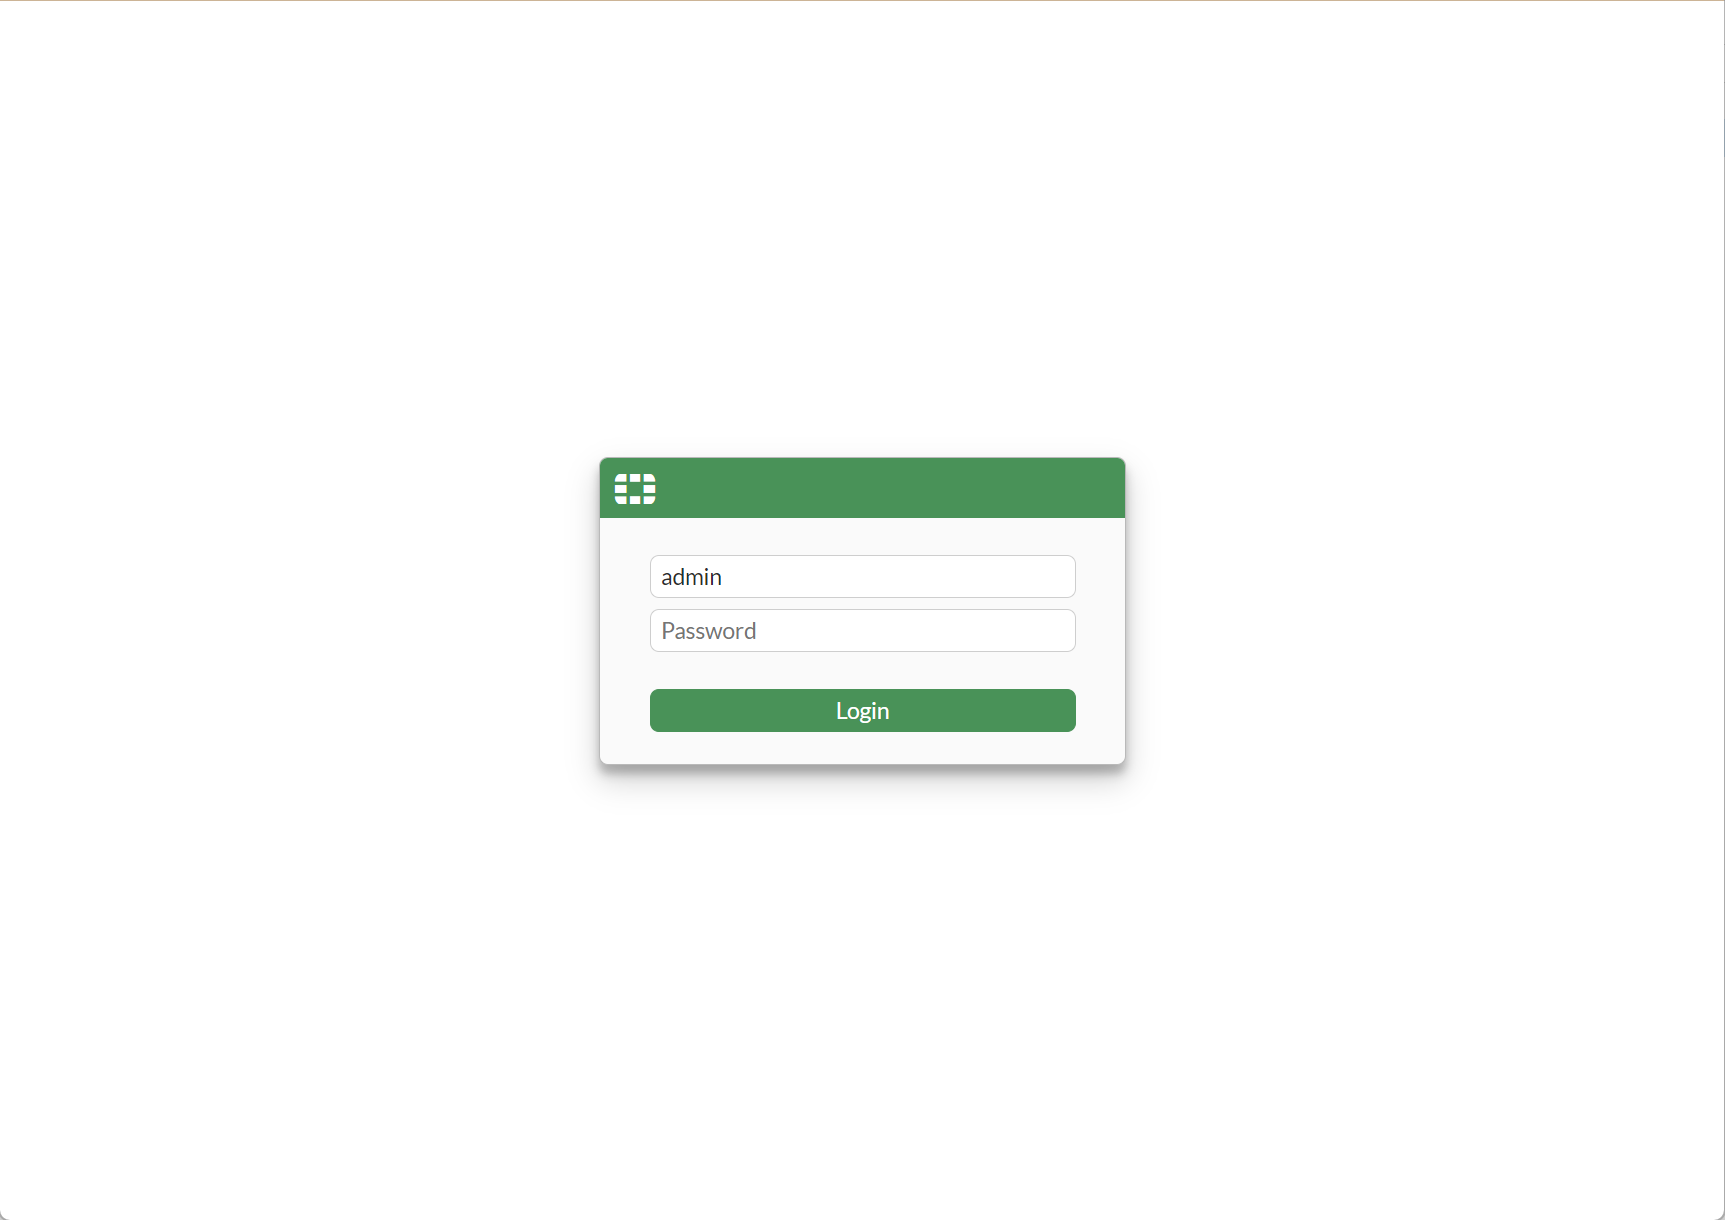
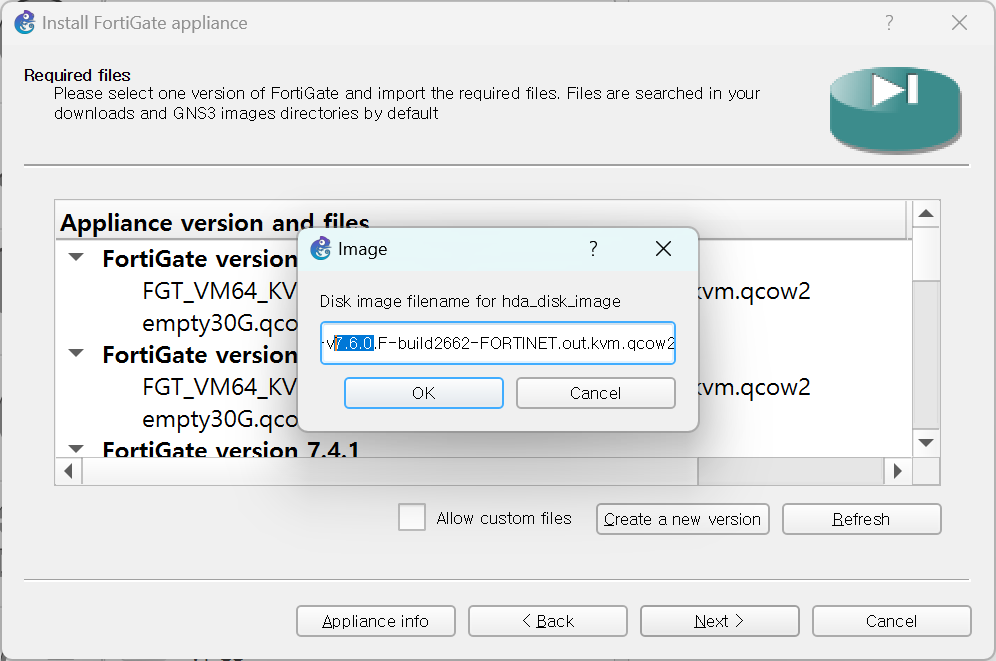
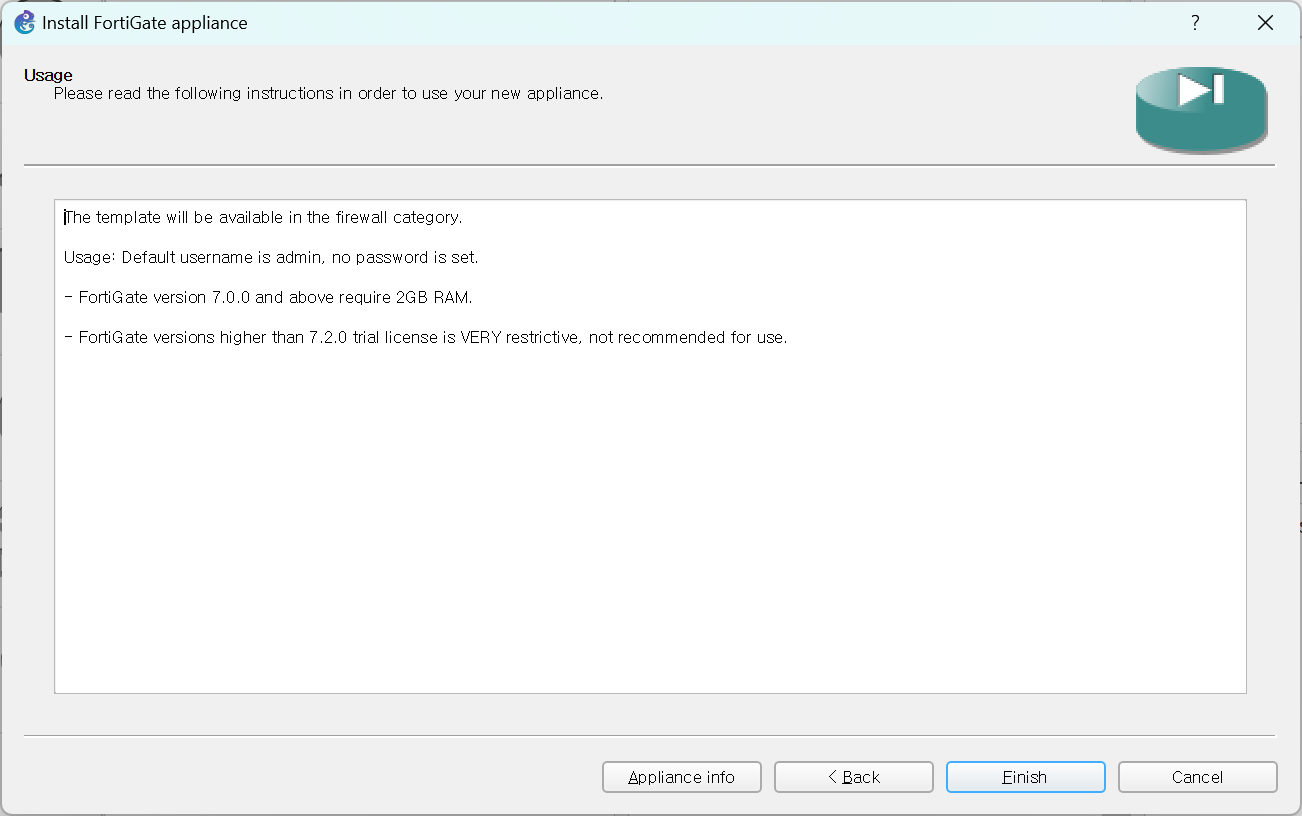
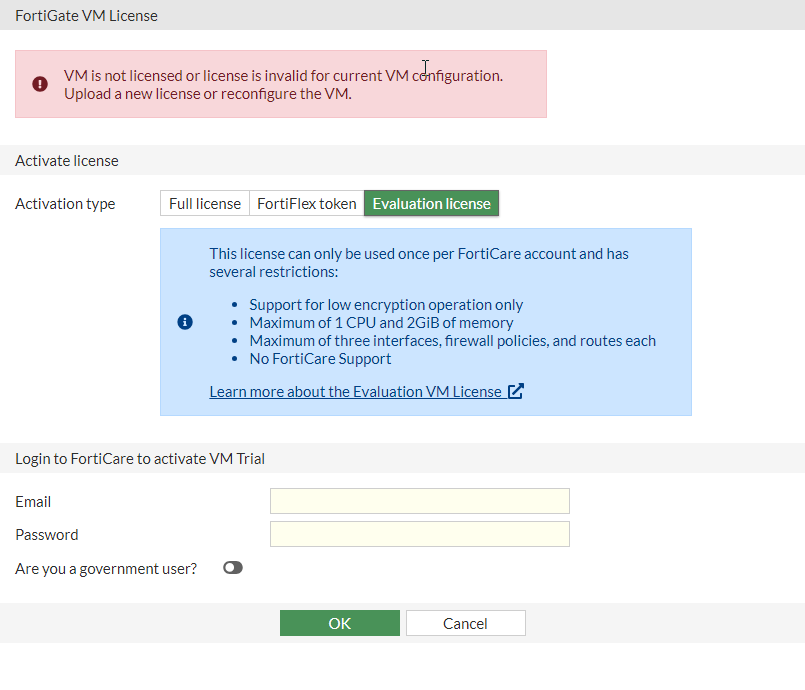
처음 로그인 하면 라이선스 매뉴가 나옵니다.

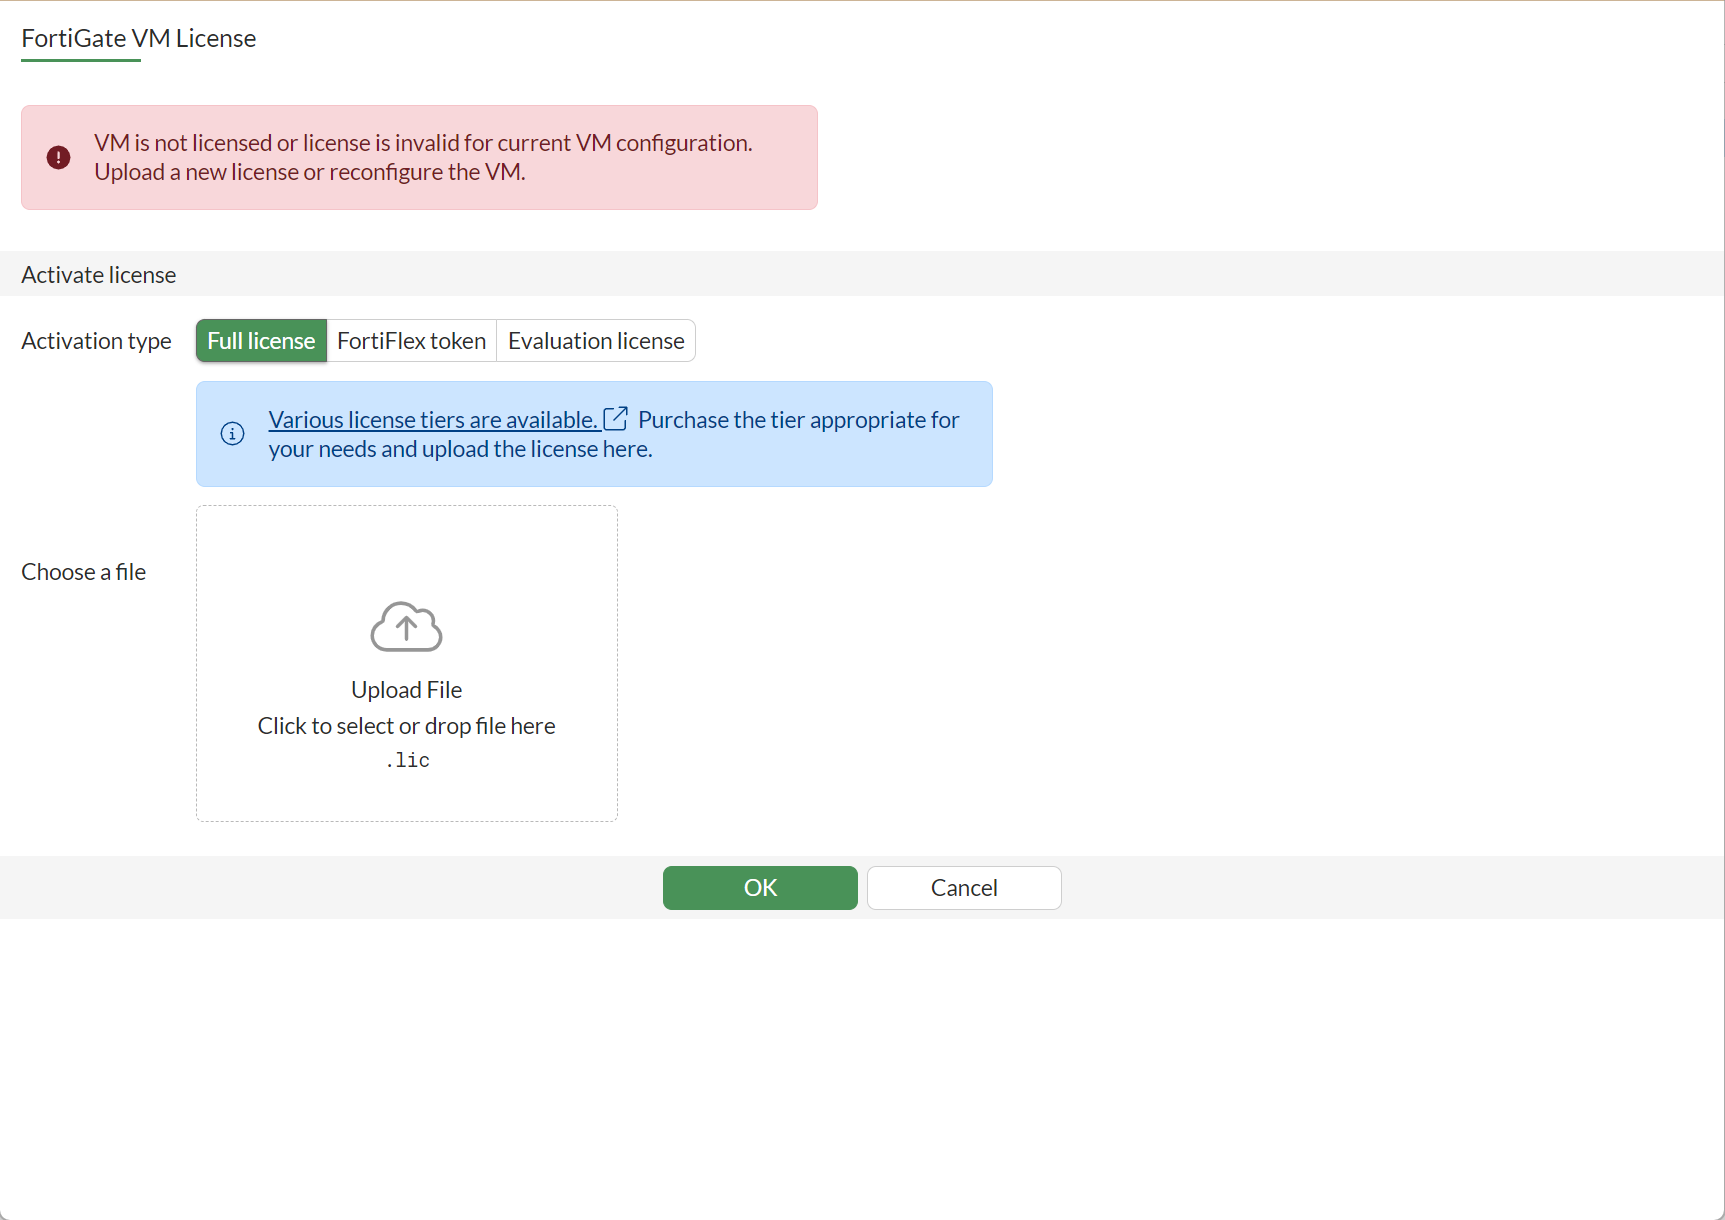
우리는 "Evaluation license"를 선택합니다.

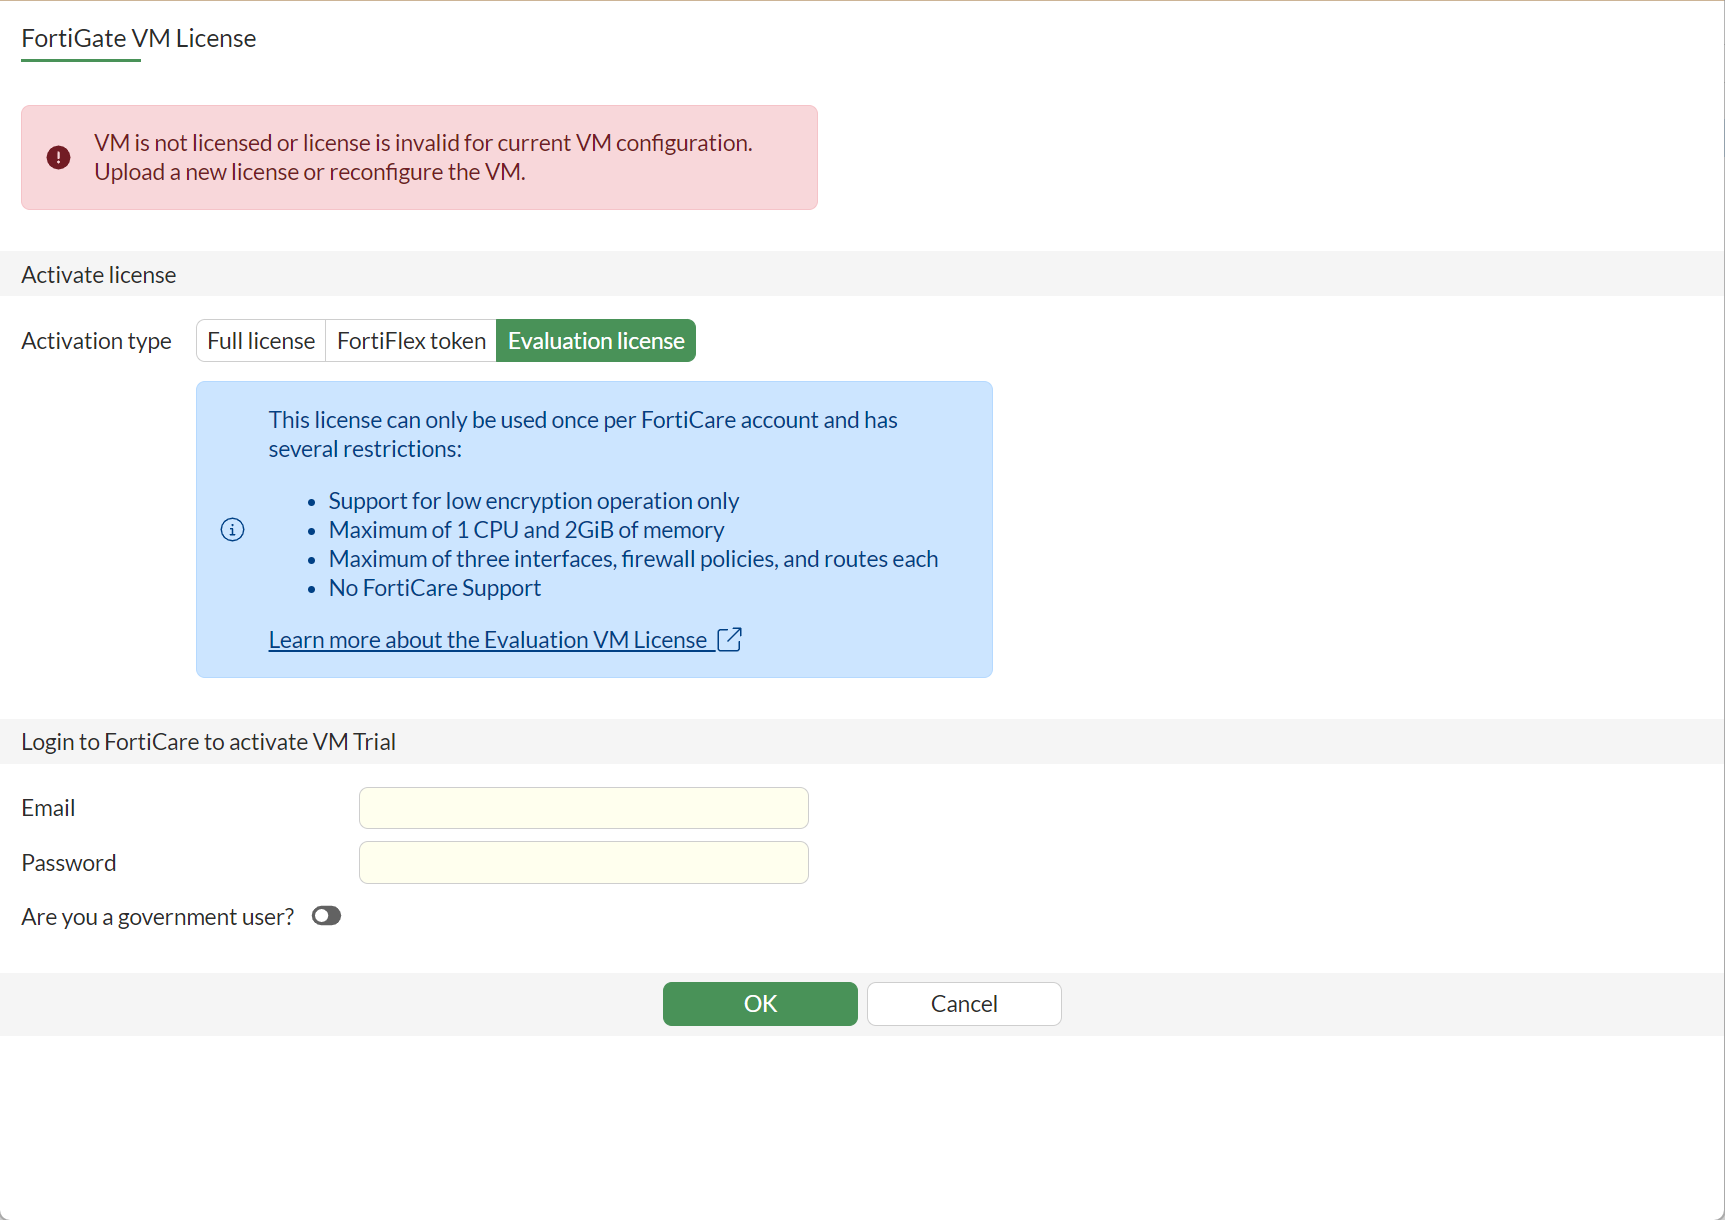
매뉴 아래에 Email, Password를 입력 후 OK를 누릅니다.


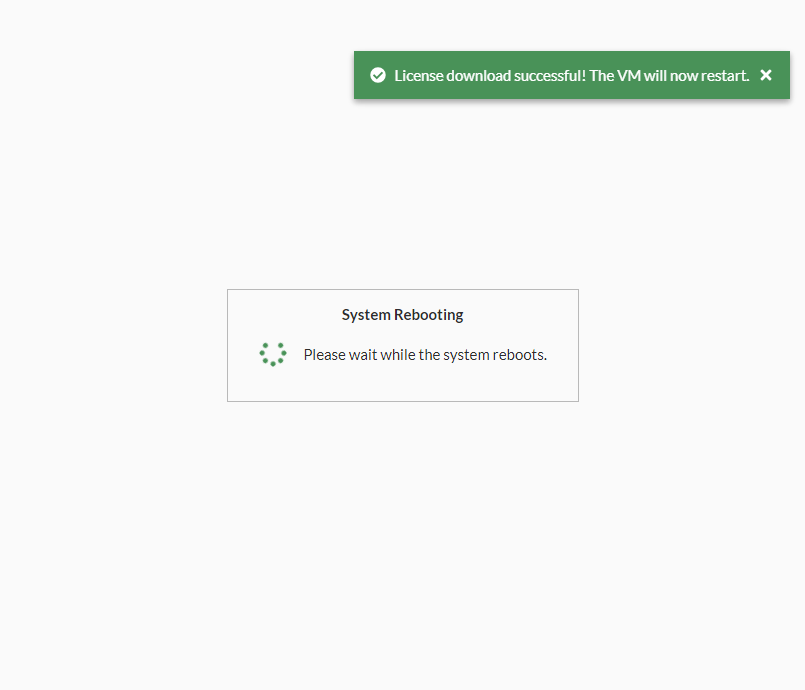
정상적으로 로그인이 된다면 화면과 같이 Confirm 매뉴와 함께 reboot 한다고 메시지가 나옵니다.

이후 OK를 누르면 reboot 되면서 설치 완료가 됩니다.


아래는 cli 방식으로  license를 갱신하는 방법입니다.

FortiGate-VM64-KVM # execute vm-license-options account-id 개인계정

FortiGate-VM64-KVM # execute vm-license-options account-password 패스워드

FortiGate-VM64-KVM # execute vm-license
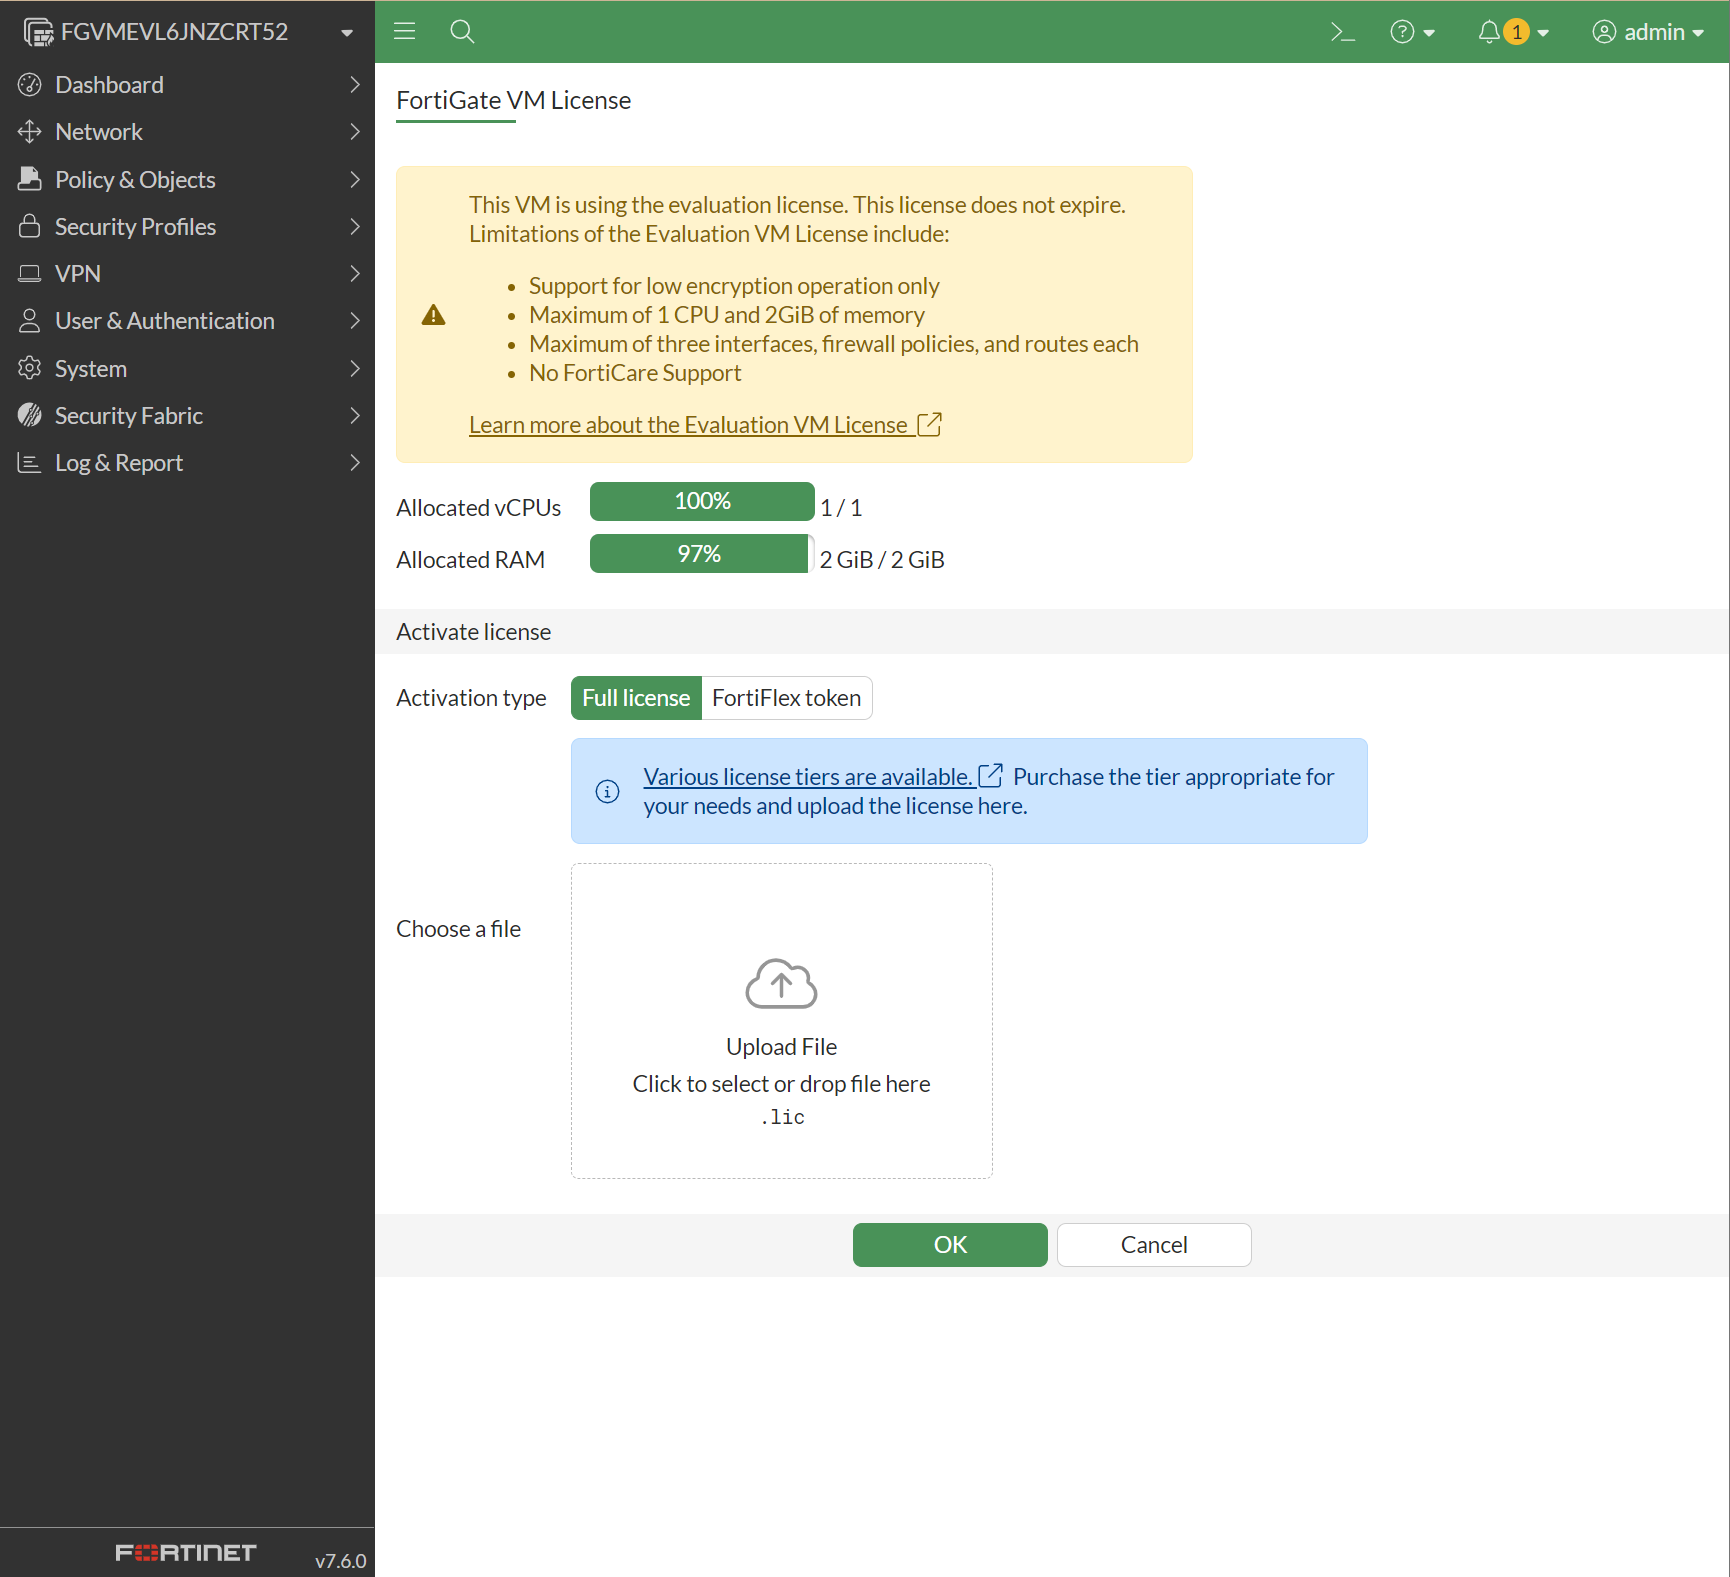
This VM is using the evaluation license. This license does not expire.
Limitations of the Evaluation VM license include:
  1.Support for low encryption operation only
  2.Maximum of 1 CPU and 2GiB of memory
  3.Maximum of three interfaces, firewall policies, and routes each
  4.No FortiCare Support
This operation will reboot the system !
Do you want to continue? (y/n)y

Requesting FortiCare Trial license, proxy:(null)
VM license install succeeded. Rebooting firewall.


FGVMEVL6JNZCRT52 login:

The system is going down NOW !!

Please stand by while rebooting the system.
Restarting system

System is starting...
The config file may contain errors.
Please see details by the command 'diagnose debug config-error-log read'.
Serial number is FGVMEVL6JNZCRT52


FGVMEVL6JNZCRT52 login:


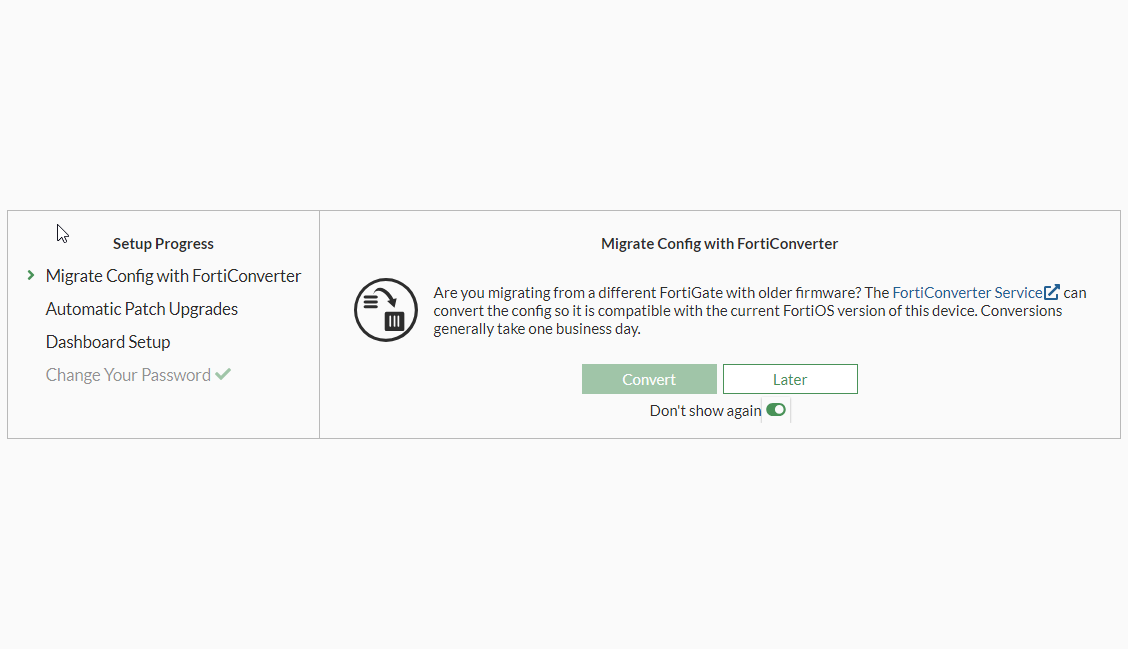
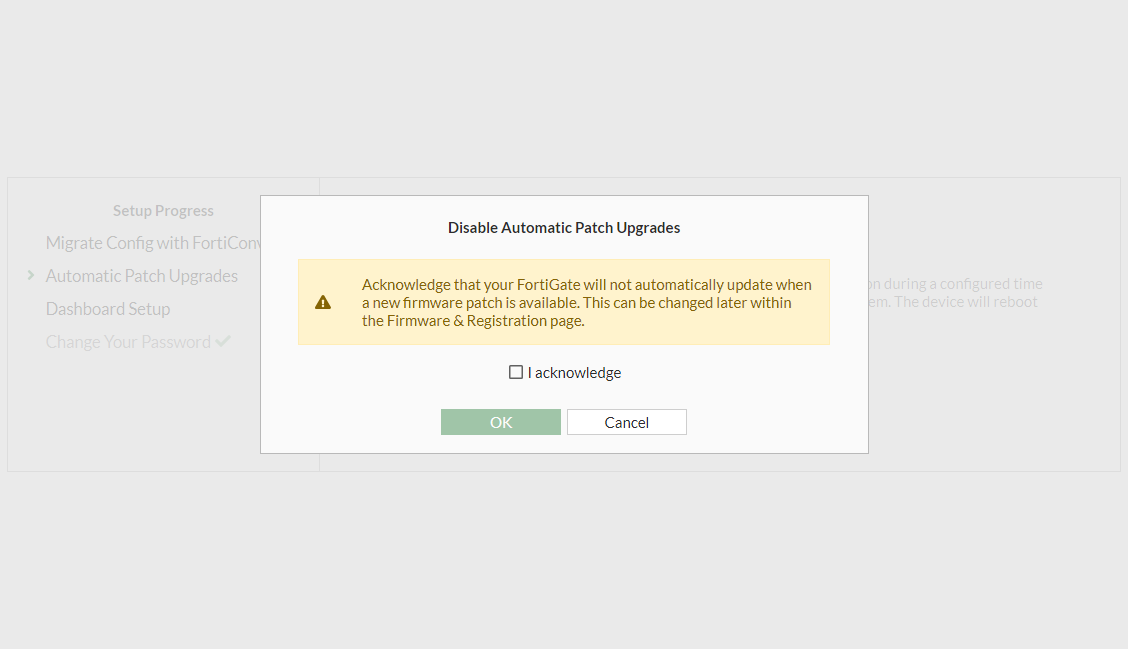
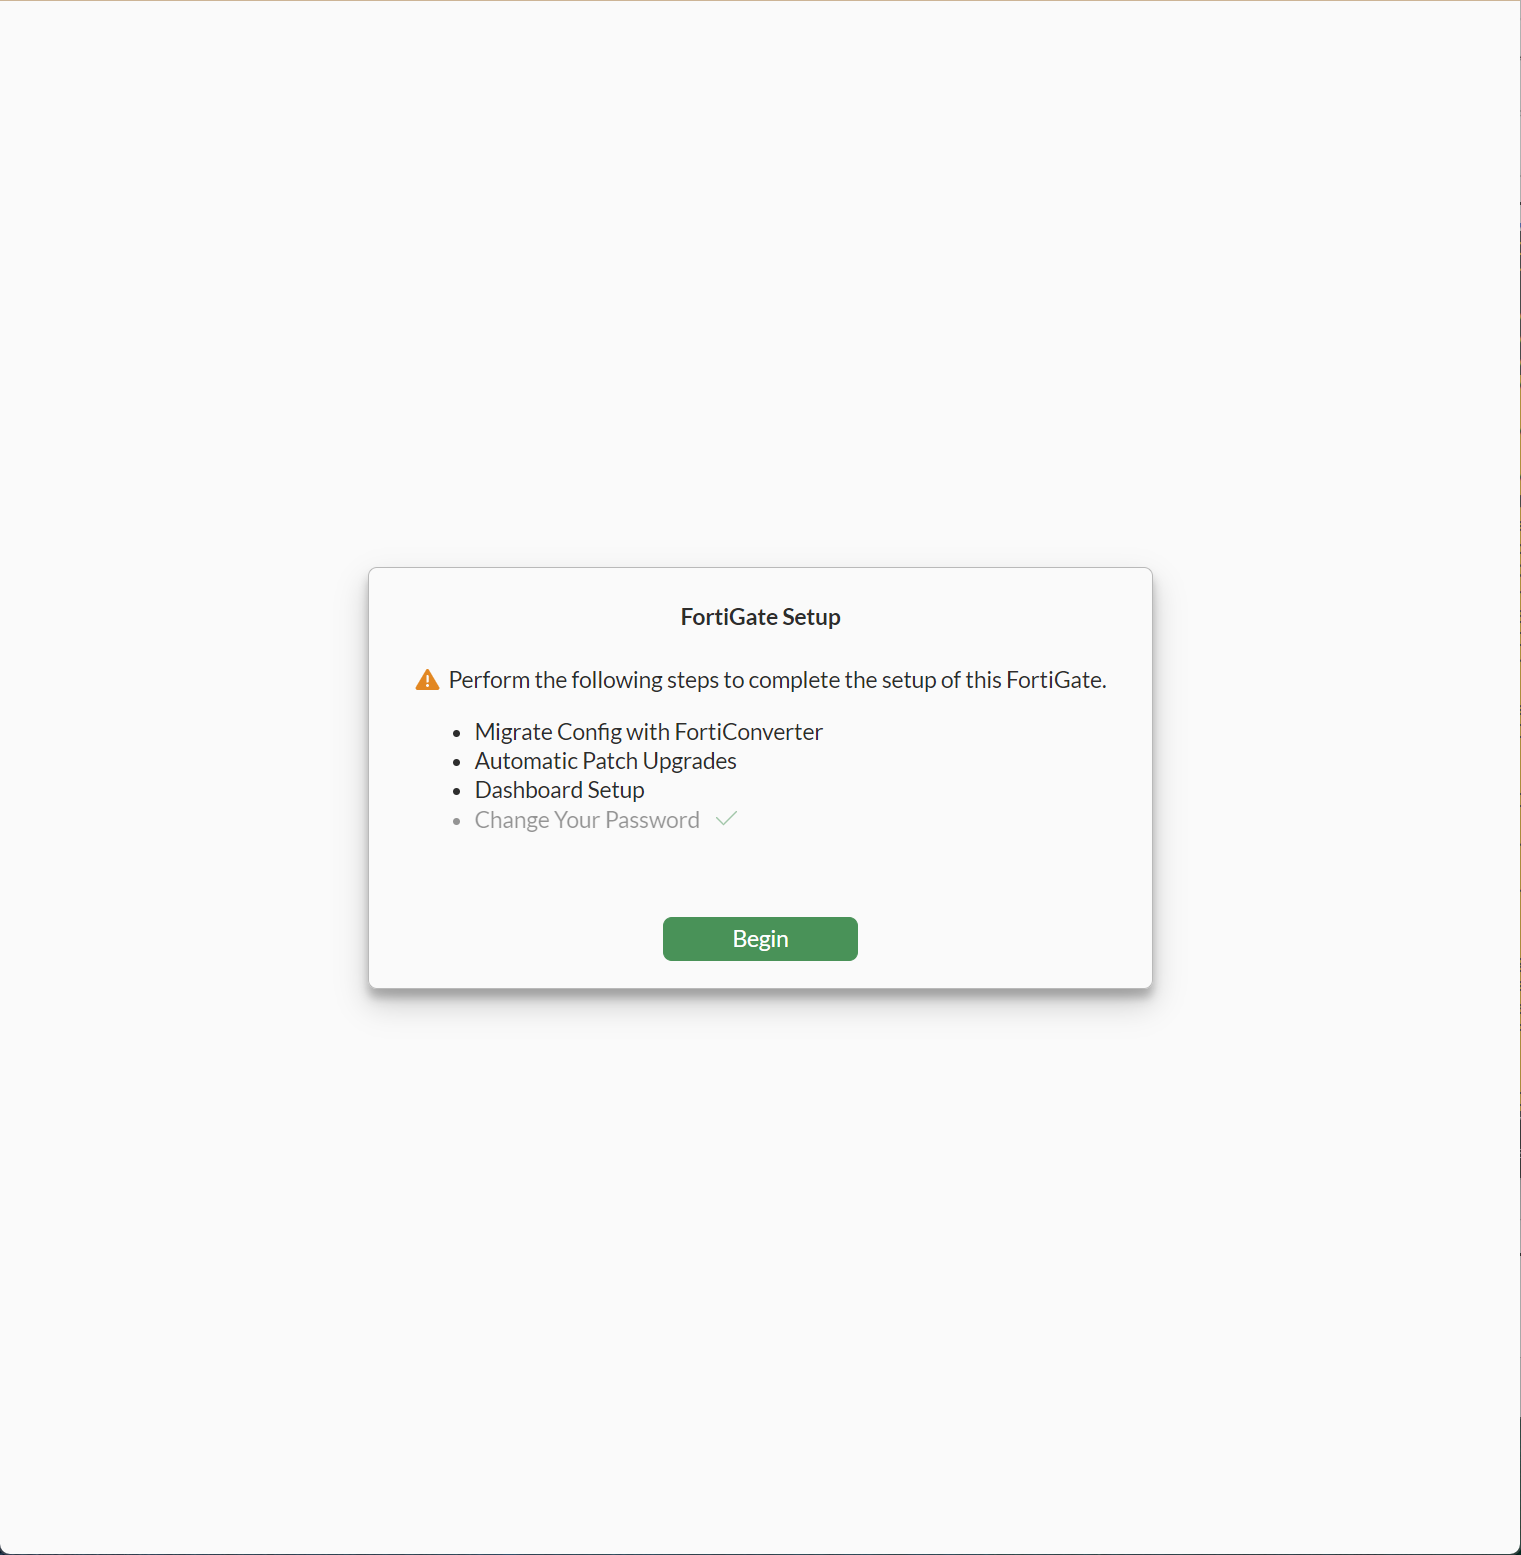
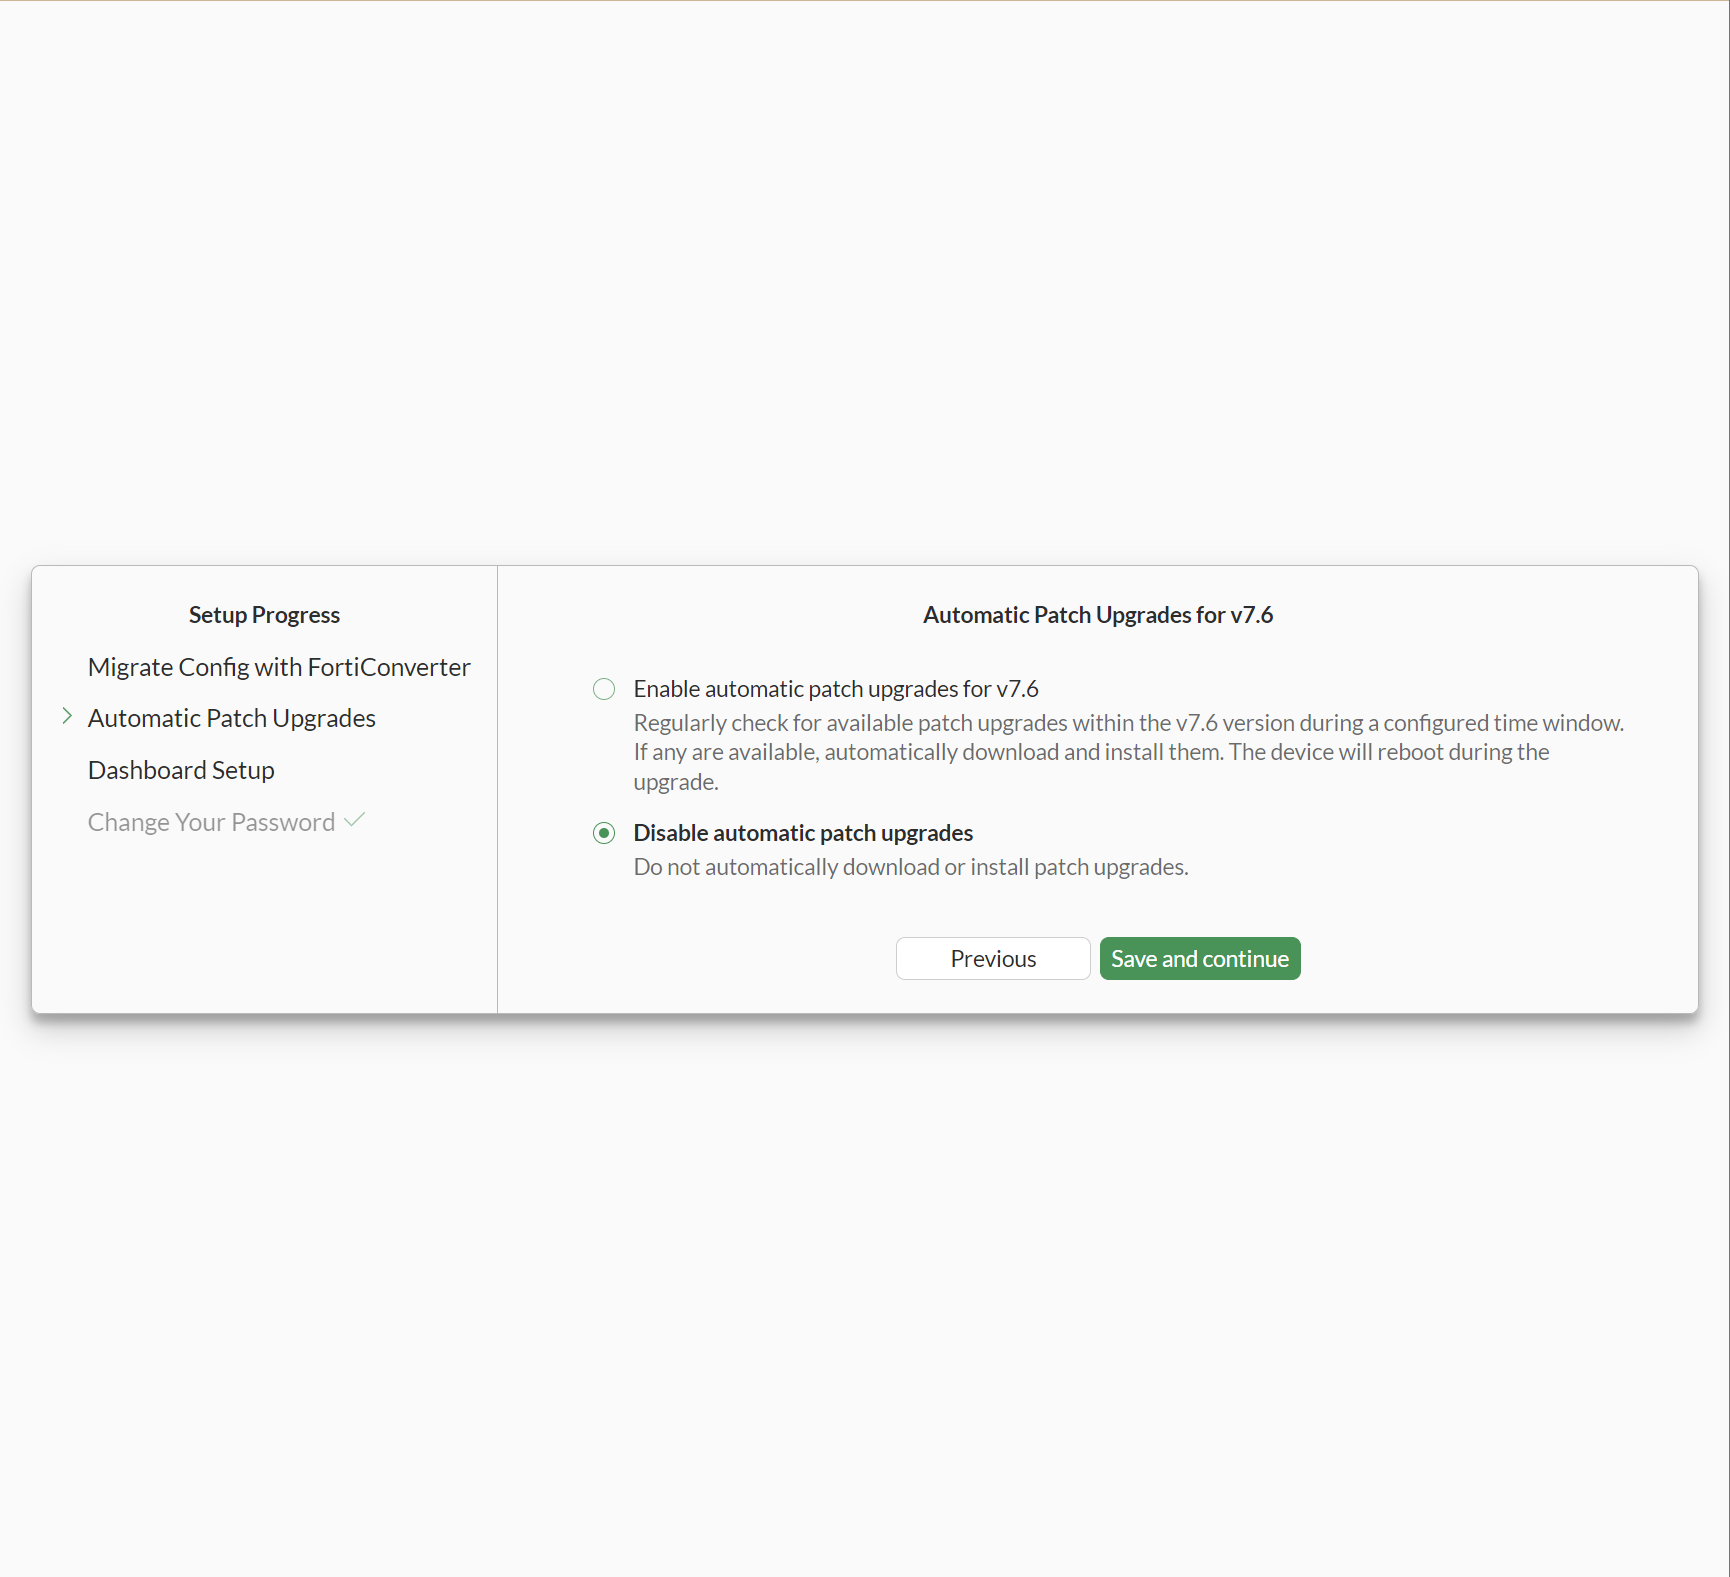
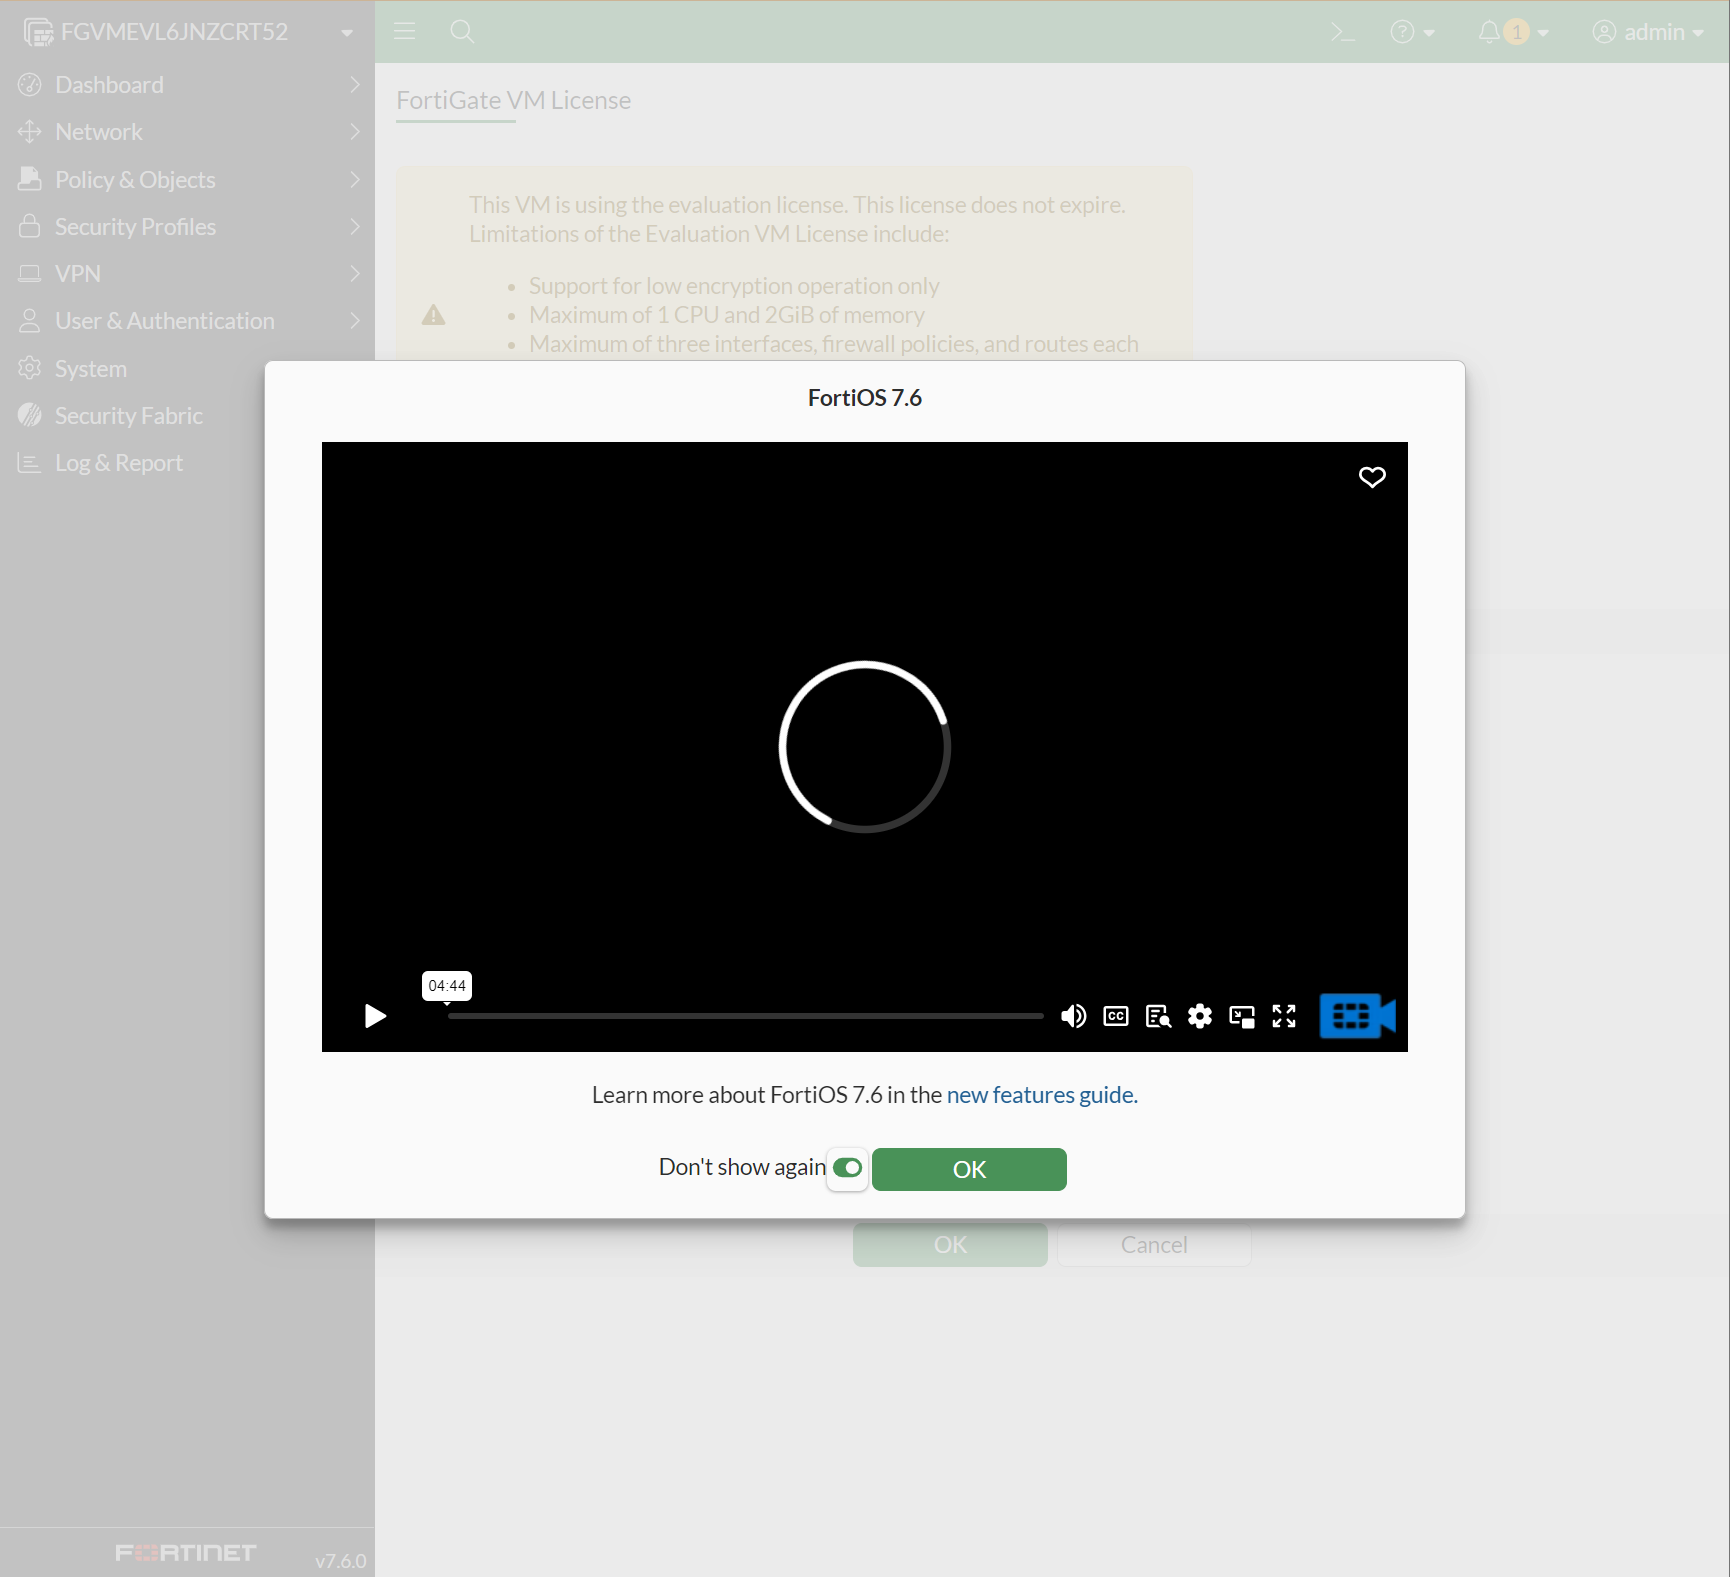
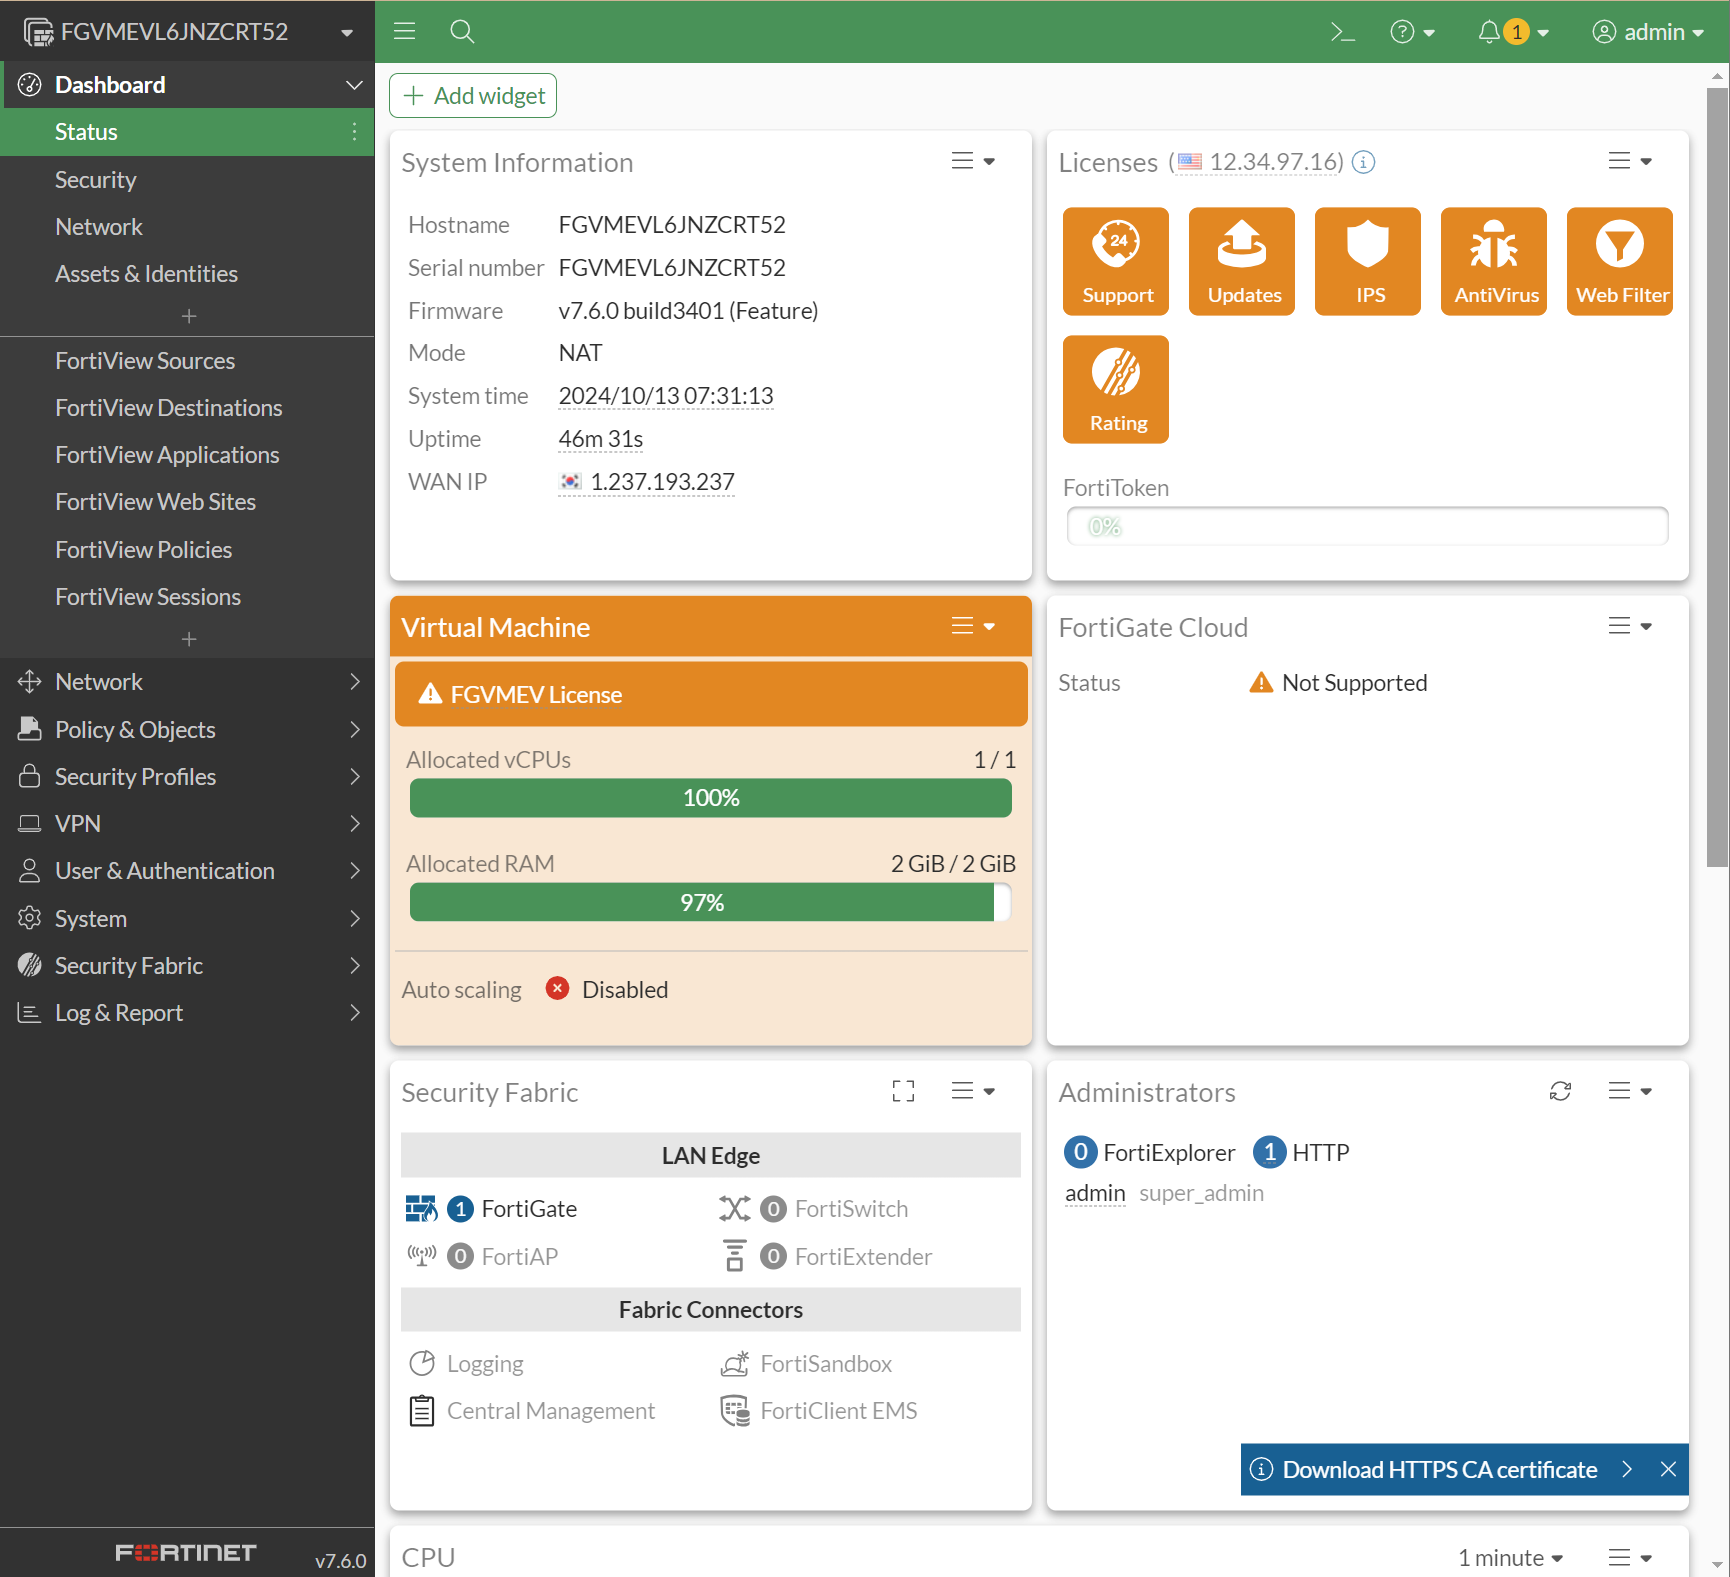
fortigate가 재시작 되어 로그인 하시면 아래와 같이 진행하시면 초기 설정이 완료됩니다.

'기술 노트 > GNS3' 카테고리의 다른 글

GNS3에서 ping 테스트 하기  (1) 2024.10.14
GNS3에서 fortigate 설치하기  (1) 2024.10.12

proxmox를 통해서 fortigate 설치를 한 적이 있습니다.

(https://dirt-spoon.tistory.com/283 참조)


fortigate VM 설치하기

회사에서 fortigate를 사용하고 있다면, 개인 계정으로도 support.fortinet.net에 가입하면 "FortiGate VM Trial" free license 버전을 제공받아 설치할 수 있습니다. (개인계정으로는 안 해 봤어요! ㅎㅎ)(이 좋은

dirt-spoon.tistory.com


그런데, 저렇게 설치만 하면 테스트 할만한게 거의 없습니다.

그래서 제대로 fortigate를 테스트 할 수 있게 GNS3에 fortigate를 구축해보려합니다.


먼저, fortigate VM을 다운로드 합니다.

다운로드된 파일을 아래 화면처럼 압축을 풀어둡니다.

GNS3를 실행하여 아래처럼 선택해 줍니다.

위의 화면에서 클릭을 하면 아래 화면처럼 Version name 화면이 나옵니다.

다운로드된 fortigate 버전으로 수정해 줍니다.

위의 화면처럼 뜨면 아래 화면처럼 버전만 변경해 줍니다.


아래 화면에서는 그냥 "OK"를 눌러줍니다.


이후 화면을 맨 아래로 내리면 아래의 그림처럼 보입니다.

저는 이미 설치했던 이력이 있어서 자동으로 탐지하는 건지 처음부터 아래 화면처럼 보이는지 모르겠네요.

어쨌든, 처음에 다운로드 받은 파일을 import 하고 넘어가겠습니다.

이후 아래의 Fortigate 버전을 선택하고 다음으로 넘어갑니다.

설치 완료입니다.

'기술 노트 > GNS3' 카테고리의 다른 글

GNS3에서 ping 테스트 하기  (1) 2024.10.14
GNS3에서 fortigate 사용하기  (0) 2024.10.13

회사에서 fortigate를 사용하고 있다면, 개인 계정으로도 support.fortinet.net에 가입하면 "FortiGate VM Trial" free license 버전을 제공받아 설치할 수 있습니다. (개인계정으로는 안 해 봤어요! ㅎㅎ)

(이 좋은 걸 몰랐네요!!)


그래서 proxmox에 fortigate를 올려보겠습니다.


FORTIGATE VM 다운로드하기

support.fortinet.com 로그인 → Firmware Download → 원하는 버전 클릭!


저는 해당 글 작성하는 기준으로 가장 최신 버전으로 다운로드를 받았습니다.

(이상하게 계속 다운로드 오류가 발생해서 7.4.3 버전으로 다운로드 받았습니다!!)


이미지 다운로드 후 proxmox 서버에 올리기

다운로드 받은 이미지

이름 변경한 이미지


어이 없게~ 확장자 바꾼다고 이미지로 올라갑니다!!

업로드된 이미지를 원래의 이름으로 변경하고 root 계정에 옮겨 놓습니다.

(proxmox에 파일 올리기 참 쉽죠~~)


VM 생성

Trial Version은 CPU가 1개만 지원하네요.

Trial Version은 Memory가 2048MB만 지원하네요.


VM 디스크 분리 및 삭제하기 (용량 아까워서)


"Detch" Click


"Remove" Click


VM에 fortigate 디스크 붙이기

생성한 fortigate vm의 "VM ID" 확인 (저는 900 입니다.)

root@my-data:~# qm disk import
400 not enough arguments
qm disk import <vmid> <source> <storage> [OPTIONS]

root@my-data:~# qm disk import 900 fortios.qcow2 local-zfs

# 900 <vmid>
# fortios.qcow2 <source>
# local-zfs <storage> <- 내가 설치한 파일시스템입니다.


"Edit" Click


"Add" Click


부팅 순서 변경하기

"Boot Order" Click


"scsi0" 으로 변경

"OK" Click


VM시작하기


로그인 하기

ID: admin

PW: 없음


IP 확인하기

FortiGate-VM64-KVM # show system interface ?

# 명령어 치면 DHCP로 설정된 IP 확인할 수 있습니다.


VM License 삭제하기

support.fortinet.com 로그인 → Products → Product List

※ FortiGate VM Trial VM이 이미 등록되어 있으면, 인증 오류 발생. (Trial VM은 1대만 가능)

※ 이미 등록 되어 있는 VM은 삭제

FortiGate VM Trial 의 "SERIAL NUMBER" Click


"Decommission This Unit" Click

"Check Box" Check 후 "Continue" Click

Trial VM 삭제 완료


위에서 설정한 ID/PW로 웹 페이지 접속


"Evaluation License" Click

support.fortinet.com의 ID/PW 입력


rebooting 후 웹페이지 재접속


드디어 설치가 끝!! 났네요.


역시 기록을 하니 복습이 되어 지식이 느네요~


이 후 부터는 알아서 하시리라 생각하겠습니다.

지식 없이 fortigate를 설치할 생각은 안 하실테니까요!!!

'기술 노트 > proxmox' 카테고리의 다른 글

내부 네트워크 추가하기  (0) 2024.10.11
GNS3 설치하기  (1) 2024.10.05
macOS 설치하기  (1) 2024.09.26
내장그래픽 패스스루 하기  (0) 2024.09.08
xpenology 설치하기  (1) 2024.05.10

아무것도 아닌데, 모르니까 너무 어렵네요.

snmp-exporter에 mib를 등록하려는데, 정확히 어떻게 해야 한다가 없어서 올립니다.


fortigate에서 snmp 다운로드 받기

1. snmp 설정 및 MIB file 다운로드


2. SNMP의 source-ip 설정

utm # config system snmp community 

utm (community) # show
config system snmp community
    edit 1
        set name "test"
        config hosts
            edit 1
                set source-ip 192.168.0.1
                set ip 192.168.0.2 255.255.255.255
            next
        end
        set query-v1-status disable
        set trap-v1-status disable
    next
end


3. 인터페이스의 SNMP 설정 적용


전제조건으로 sslvpn의 계정 생성 시, RADIUS 서비스를 이용한 계정 생성이 필수입니다.


RADIUS를 사용할 경우 sslvpn portal 설정의 ip-mode를 변경하여 고정 IP를 부여 할 수 있습니다.

당연하게도 fortigate는 유용한 기능은 CLI 모드에서만 적용이 가능합니다.


FORTIGATE # show vpn ssl web portal full-access-static-ip
config vpn ssl web portal
    edit "full-access-static-ip"
        set tunnel-mode enable
        set web-mode enable
        set ip-mode user-group # 해당 옵션이 RADIUS에서 고정 IP를 부여하는 옵션입니다.
        set ip-pools "SSLVPN_TUNNEL_ADDR1"
        set split-tunneling disable
        config bookmark-group
            edit "gui-bookmarks"
            next
        end
    next
end
FORTIGATE (full-access-stat~-ip) # set ip-mode  
range         Use the IP addresses available for all SSL-VPN users as defined by the SSL settings command.
user-group    Use the IP addresses associated with individual users or user groups (usually from external auth servers).
dhcp          Use IP addresses obtained from external DHCP server.
 
FORTIGATE (full-access-stat~-ip) #

보통 일반적인 설정으로 사용하는 ip-mode는 range 입니다.


Fortigate 설정 시 Portal Mapping 입니다.


아래의 게시글은 계정에 IP를 고정하는 설정입니다.

https://dirt-spoon.tistory.com/163


※ IP를 고정할 때에는 반드시 "SSLVPN_TUNNEL_ADDR1" 대역에 포함되는 IP로 설정해야 합니다.

  - SSLVPN_TUNNEL_ADDR1: SSLVPN에 사용되는 IP RANGE 주소 입니다.

sslvpn의 공격 접속 시도는 어마무시 합니다.

그래서 패스워드 3회 입력 실패 시 기본 60초를 600초로 변경합니다.


fortigate # config vpn ssl settings
fortigate (settings) # set 
# 다른 내용은 표시하지 않음
login-block-time                 Time for which a user is blocked from logging in after too many failed login attempts (0 - 86400 sec, default = 60).

fortigate (settings) # set login-block-time 600
fortigate (settings) # get
# 다른 내용은 표시하지 않음
login-block-time    : 600
fortigate (settings) # end

fortigate의 관리자 권한 접근 시 패스워드를 3번 틀릴경우, 기본적으로 잠김 시간은 60초 입니다.

너무 약하다 싶어 패스워드 입력 실패를 5회로, 기본 잠김 시간은 600초로 변경했습니다.


fortigate # config system global

fortigate (global) # set 
# 다른 내용은 생략
admin-lockout-duration                      Amount of time in seconds that an administrator account is locked out after reaching the admin-lockout-threshold for repeated failed login attempts.
admin-lockout-threshold                     Number of failed login attempts before an administrator account is locked out for the admin-lockout-duration.

fortigate (global) # set admin-lockout-duration 600
fortigate (global) # set admin-lockout-threshold 5

fortigate (global) # get
# 다른 내용은 생략
admin-lockout-duration: 600
admin-lockout-threshold: 5

fortigate (global) # end

fortigate #

포티게이트의 웹 페이지 접근 보호 방법을 공유 합니다.

웹 페이지 노출을 맞기 위해서는 관리자 계정에 접근 제한을 하시면, 자동으로 웹 페이지 화면 노출이 차단됩니다.

WAN 인터페이스의 Administrative access에서 PING을 제거한다면,

외부에서 PING 체크도 되지 않으면서, 허용된 IP로 웹을 접속할 수 있게 됩니다.


[관리자 계정의 "Restrict login to trusted hosts" 활성화 여부: OFF]


[관리자 계정의 "Restrict login to trusted hosts" 활성화 여부: ON]


[WAN 인터페이스의 "PING" 체크 해제]

FortiGate-100D # config system interface
FortiGate-100D # show
config system interface
    edit "wan1"
        set vdom "root"
        set mode dhcp
        set allowaccess https ssh http
        set type physical
        set role wan
        set snmp-index 1
    next
    edit "dmz"
        set vdom "root"
        set ip 10.10.10.1 255.255.255.0
        set allowaccess ping https http fgfm fabric
        set type physical
        set role dmz
        set snmp-index 2
    next
    edit "modem"
        set vdom "root"
        set mode pppoe
        set type physical
        set snmp-index 3
    next
    ...
FortiGate-100D # edit <인터페이스 이름>
FortiGate-100D # edit wan1
FortiGate-100D (wan1) # show
config system interface
    edit "wan1"
        set vdom "root"
        set mode dhcp
        set allowaccess https ssh http
        set type physical
        set role wan
        set snmp-index 1
    next
end
FortiGate-100D (wan1) # set allowaccess ?
ping              PING access.
https             HTTPS access.
ssh               SSH access.
snmp              SNMP access.
http              HTTP access.
telnet            TELNET access.
fgfm              FortiManager access.
radius-acct       RADIUS accounting access.
probe-response    Probe access.
fabric            Security Fabric access.
ftm               FTM access.

FortiGate-100D (wan1) # set allowaccess <필요한 프로토콜 입력1> <필요한 프로토콜 입력2> ...
FortiGate-100D (wan1) # set allowaccess https http ssh

FortiGate-100D (wan1) # end

FortiGate-100D #

'기술 노트 > fortigate' 카테고리의 다른 글

로그인 알람 설정  (0) 2023.04.06
fortigate 6.2.X버전의 logstash 설정  (0) 2023.04.04
interface status cli  (0) 2023.03.24
system shutdown cli  (0) 2023.03.24
tftp 사용하여 펌웨어 복구  (0) 2023.03.24
FortiGate-100D # get system interface physical
== [onboard]
        ==[dmz]
                mode: static
                ip: 10.10.10.1 255.255.255.0
                ipv6: ::/0
                status: down
                speed: n/a
        ==[ha1]
                mode: static
                ip: 0.0.0.0 0.0.0.0
                ipv6: ::/0
                status: down
                speed: n/a
        ==[ha2]
                mode: static
                ip: 0.0.0.0 0.0.0.0
                ipv6: ::/0
                status: down
                speed: n/a
        ==[mgmt]
                mode: static
                ip: 192.168.1.99 255.255.255.0
                ipv6: ::/0
                status: down
                speed: n/a
        ==[wan1]
                mode: dhcp
                ip: 192.168.0.14 255.255.255.0
                ipv6: ::/0
                status: up
                speed: 1000Mbps (Duplex: full)
        ==[wan2]
                mode: dhcp
                ip: 0.0.0.0 0.0.0.0
                ipv6: ::/0
                status: down
                speed: n/a
        ==[modem]
                mode: pppoe
                ip: 0.0.0.0 0.0.0.0
                ipv6: ::/0
                status: down
                speed: n/a

FortiGate-100D #


'기술 노트 > fortigate' 카테고리의 다른 글

로그인 알람 설정  (0) 2023.04.06
fortigate 6.2.X버전의 logstash 설정  (0) 2023.04.04
interface https http ssh 접속 허용 cli  (0) 2023.03.24
system shutdown cli  (0) 2023.03.24
tftp 사용하여 펌웨어 복구  (0) 2023.03.24

+ Recent posts